
Creating emails with rich text editor
Rich text editor provides a familiar content editing experience, like email clients (e.g., Gmail). This editor is best for these use cases:
-
Personalized messaging. Rich text editors are excellent for crafting personalized emails that require a high degree of textual customization, such as adding specific customer details, personal notes, or tailored calls to action that may not fit well into pre-designed drag-and-drop templates.
-
Simplicity and speed. For quick updates or when sending straightforward communications without complex layouts, rich text editors allow for faster email creation, editing, and sending, saving time, especially in high-volume or time-sensitive scenarios.
-
Mobile optimization. Emails crafted in rich text editors are generally lighter in code and formatting, which can help improve the loading speed and display on mobile devices, enhancing readability and engagement for on-the-go readers.
-
Accessibility considerations. Rich text editors can help ensure better control over accessibility features such as text alternatives and readability. This is crucial for reaching audiences with disabilities or preferences for text-based email communication.
-
Content-focused communications. When the message's textual content is more important than visual appeal, rich text editors allow marketers to focus on crafting compelling copy without distractions from complex design elements.
-
Lower bandwidth usage. Emails created with rich text editors typically have smaller file sizes than those with heavy images and layouts from drag & drop editors, which benefits recipients with limited internet bandwidth.
-
Integration of dynamic content. Rich text editors are often better suited for integrating dynamic content, such as personalized tokens or complex variables that may not be as straightforward to implement in a drag-and-drop environment.
-
Compliance and branding. Easily maintain compliance with brand standards in text formatting and tone, which can sometimes be diluted in more visually focused drag-and-drop editors where branding elements might overshadow textual nuances.
-
Educational or informative content. For emails intended to educate or inform, such as industry news updates or detailed product information, a rich text editor can simplify the presentation to focus the reader on the message rather than the design.
Creating email
You can create the email directly from the journey action step "Send email."
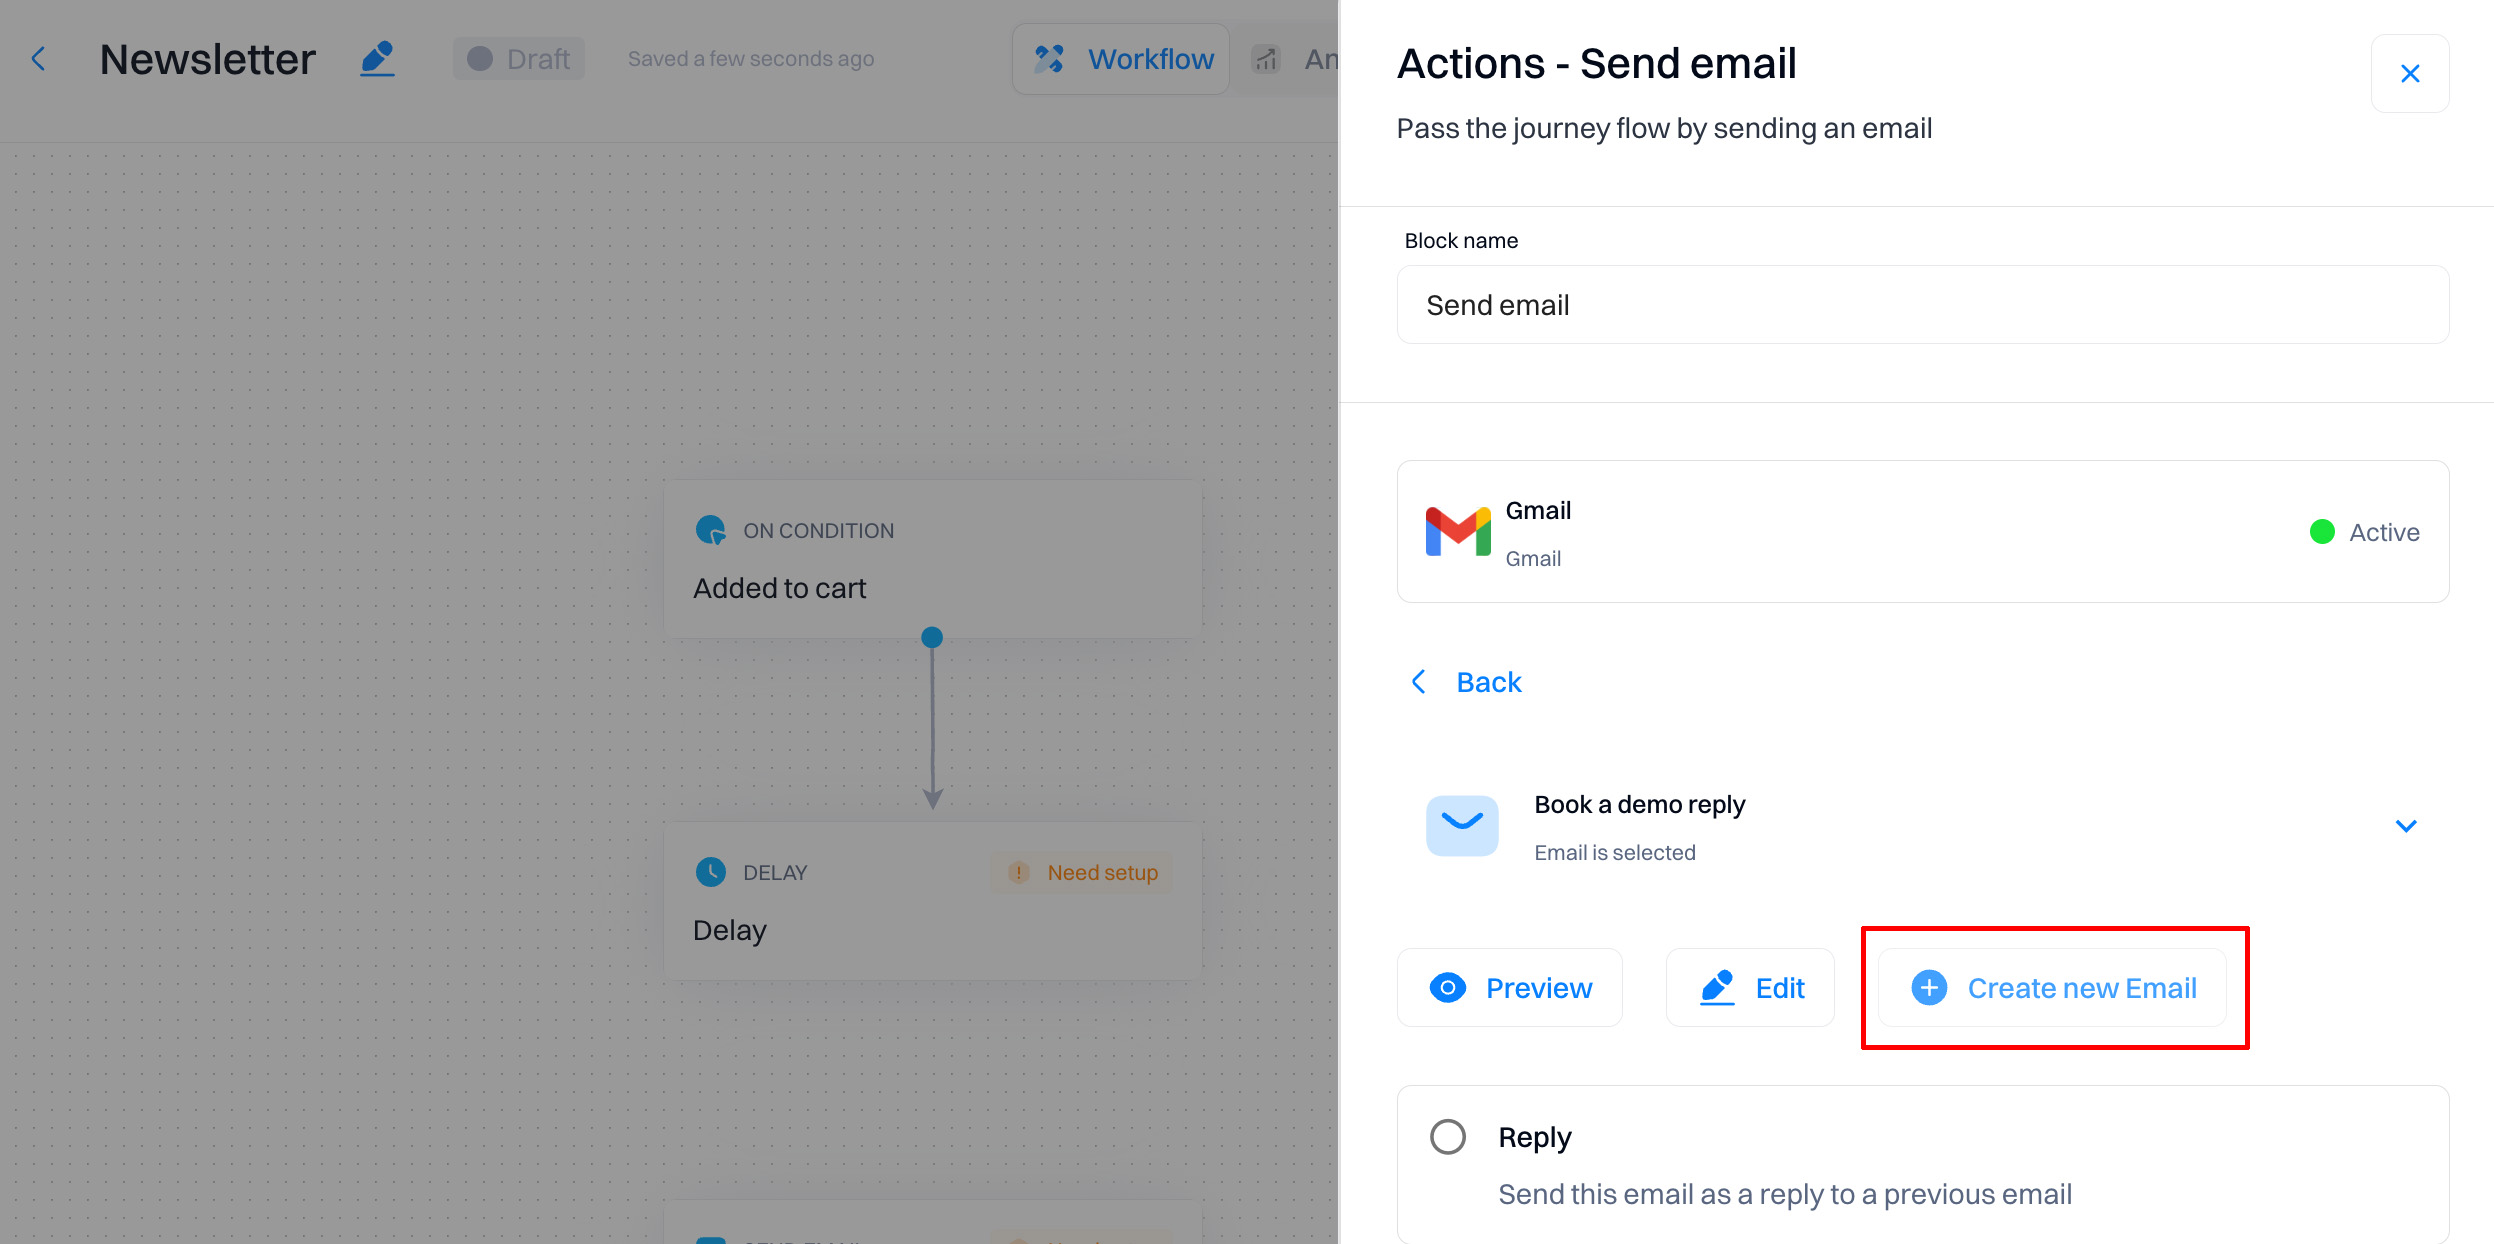
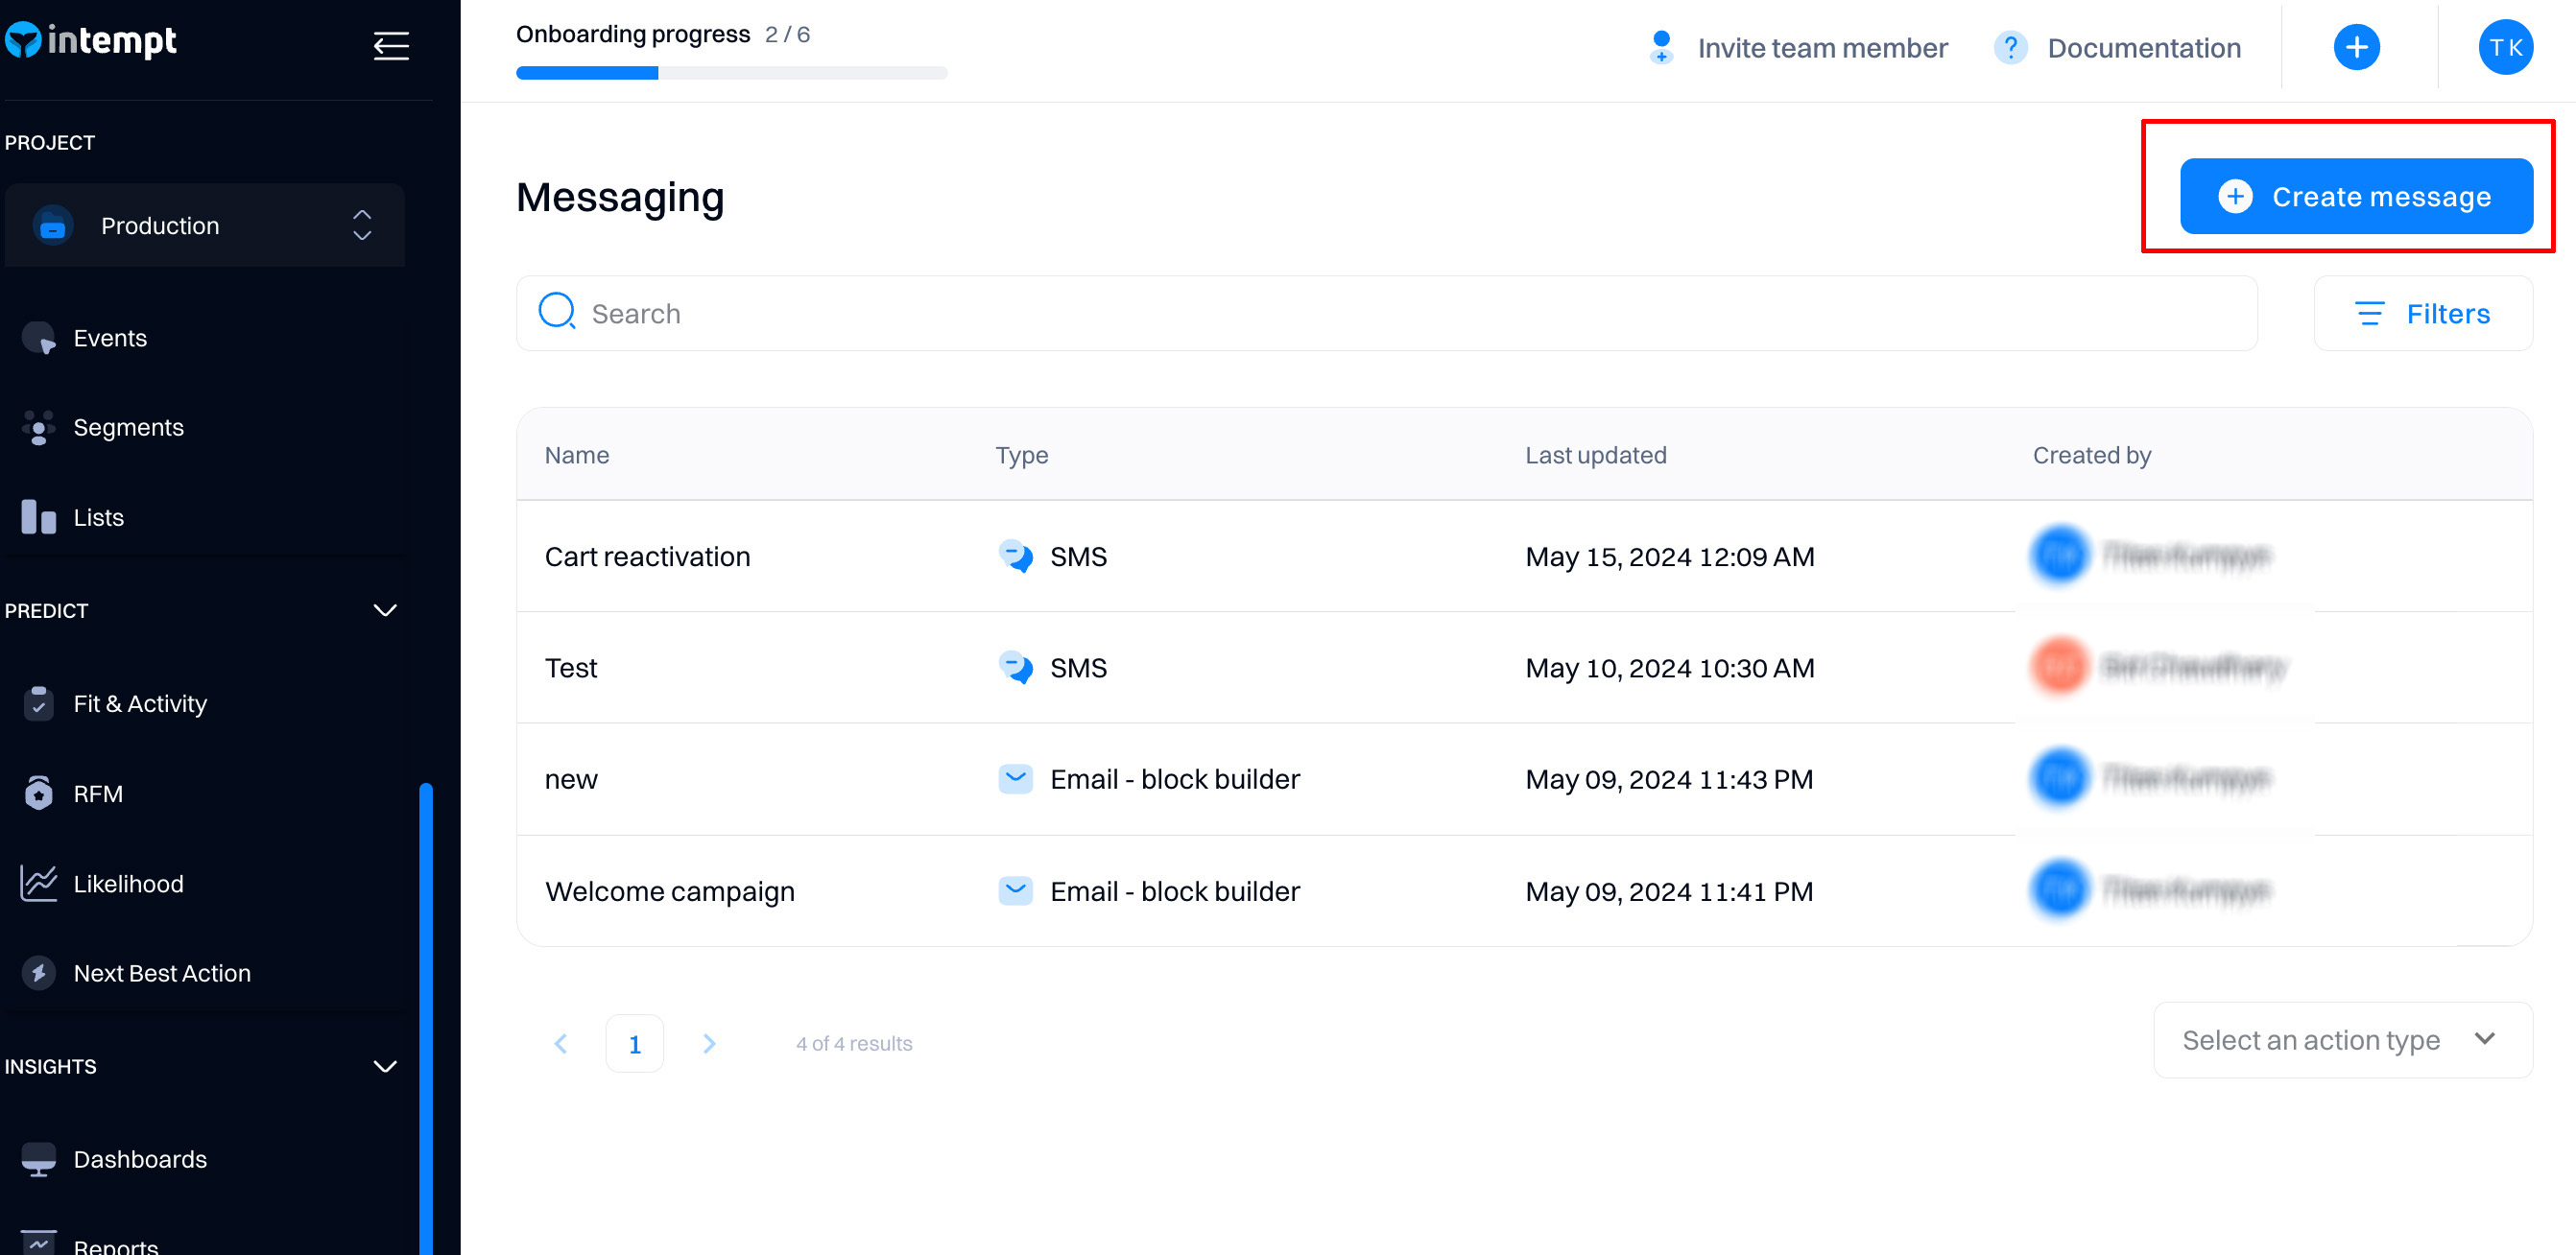
Alternatively, you can create the email from the Messages section.
Next, select the "Rich text" type of email editor. You can either start from scratch or reuse existing emails as a template.

Configuration overview
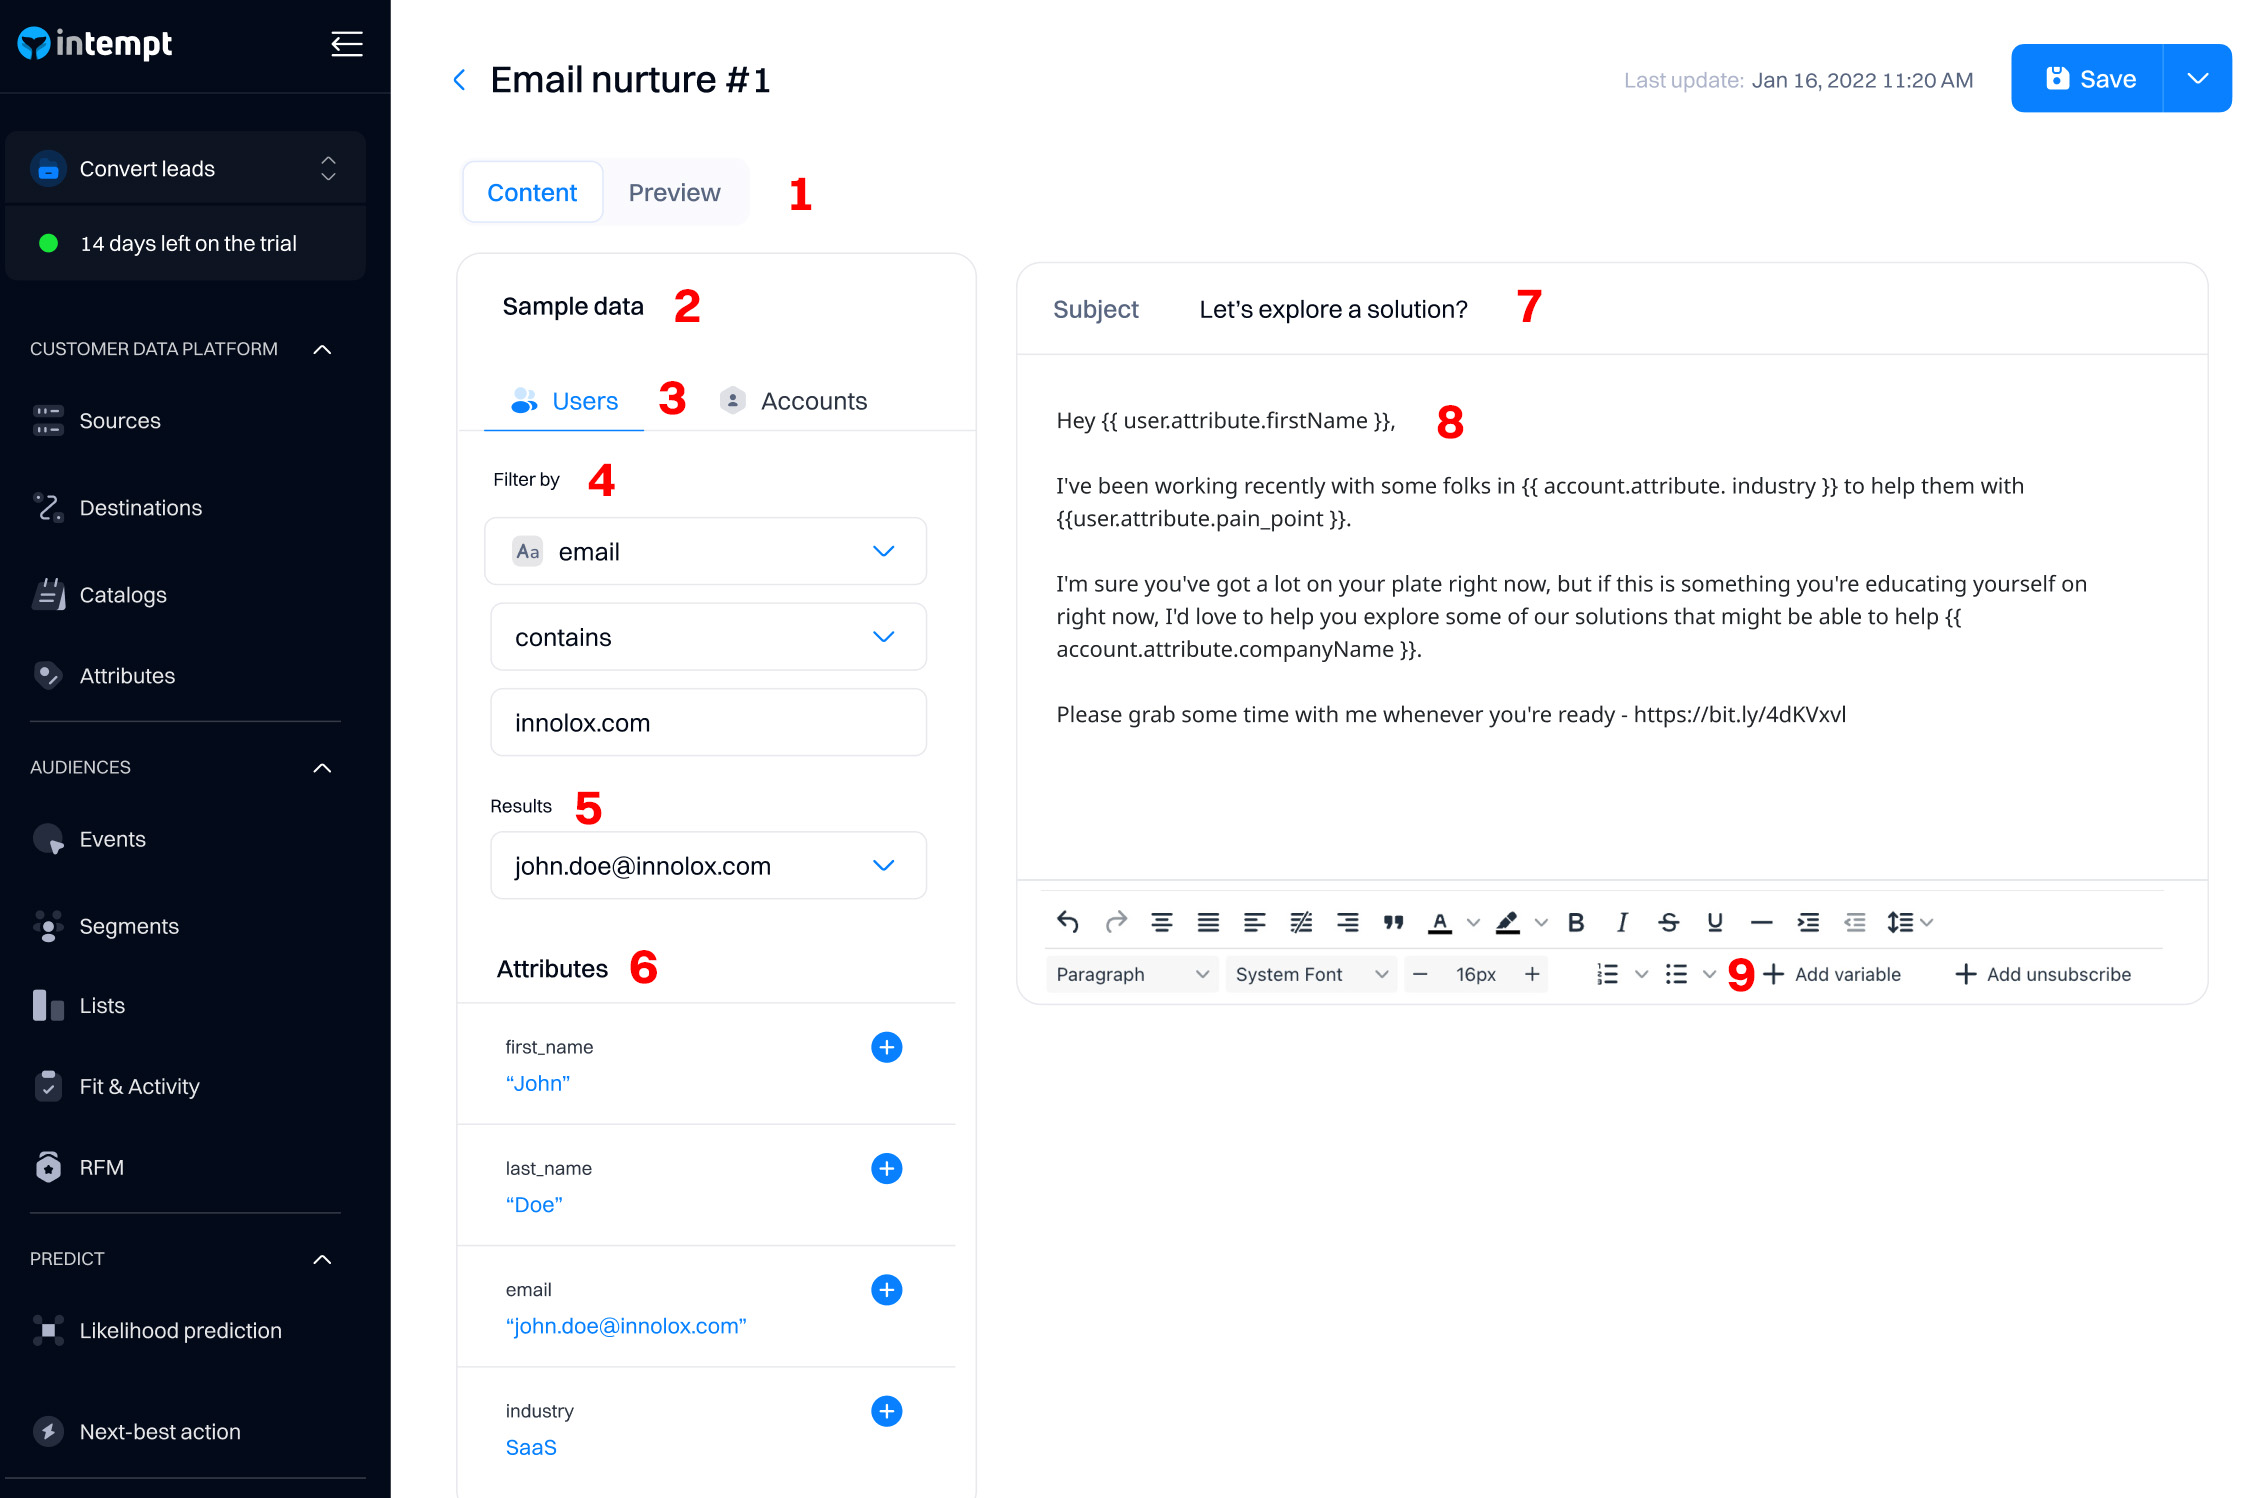
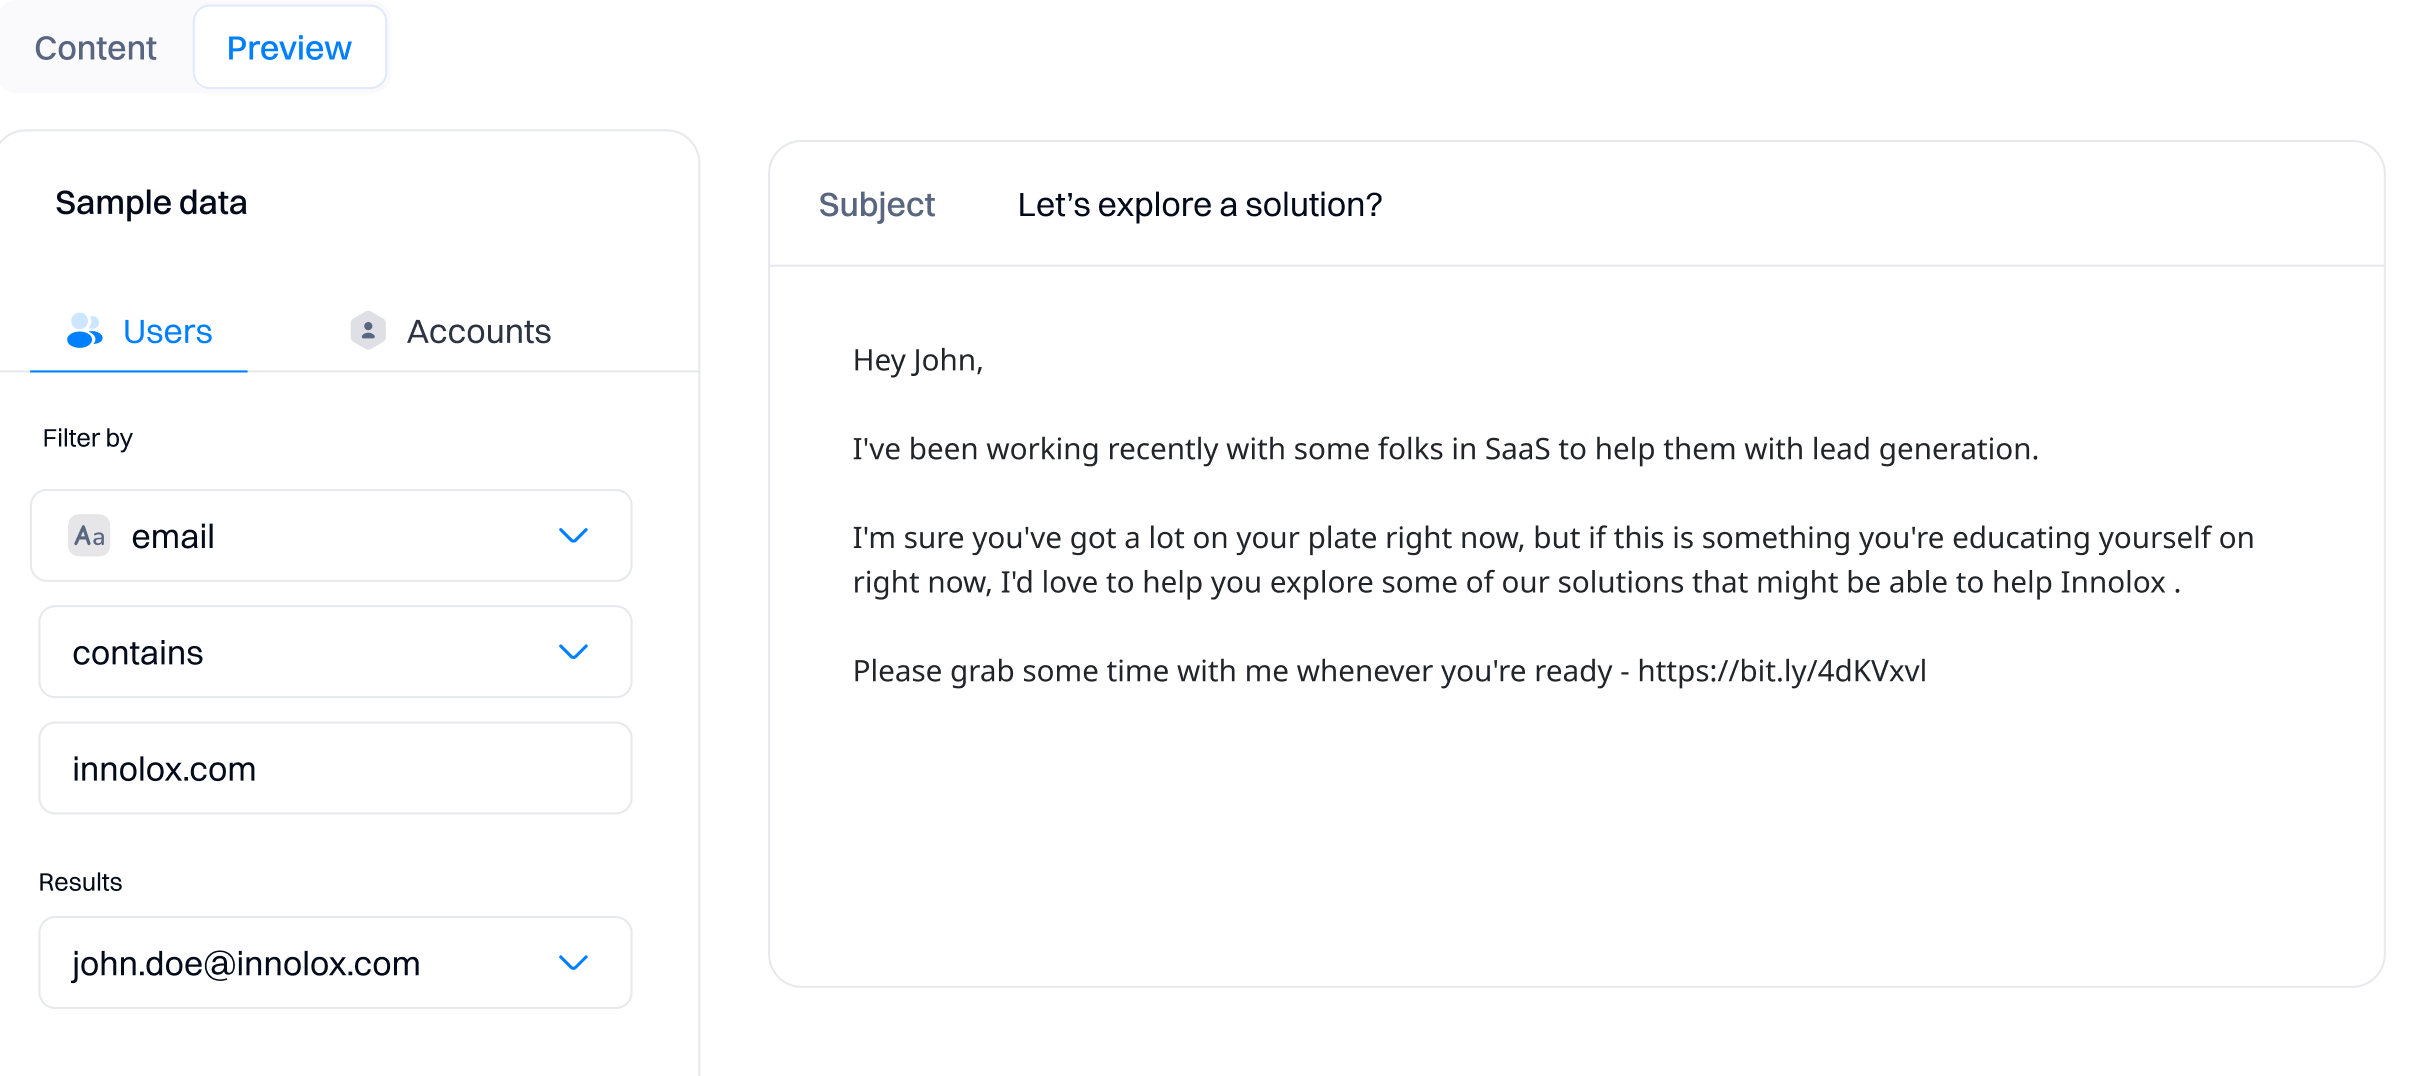
- Content/Preview. Under the "Content" tab, you format and edit the email, and under the "Preview" tab, you can view how the email will be displayed for the selected user under the "Sample data" section. Refer to the example below.
Good to know
"Sample data" needs to be filled to preview the the email for specific user. If no user or account is selected, the preview will display same variables with {} as in the "Content" section.
- Sample data. Under this section, you can select a specific user or account to preview their attributes. This is useful for understanding which attributes have values and allows the insertion of the selected variables into the SMS message body.
- Users/accounts. Switch between user or account level. Depending on your selection, you can select user or account attributes in the dropdown below.
- Filter by. Filter users or accounts based on a selected attribute's value, e.g., location, email, etc.
- Results. Users or accounts that match the specified filter criteria will displayed under the "Results" dropdown. Select the user or account for the "Attributes" section to appear.
- Attributes. A list of all attributes for a selected user or account. Selecting the blue plus icon will insert the variable into the message body.
Good to know
Ensure that before clicking on the icon, you select a specific place in the message where the variable should be inserted.
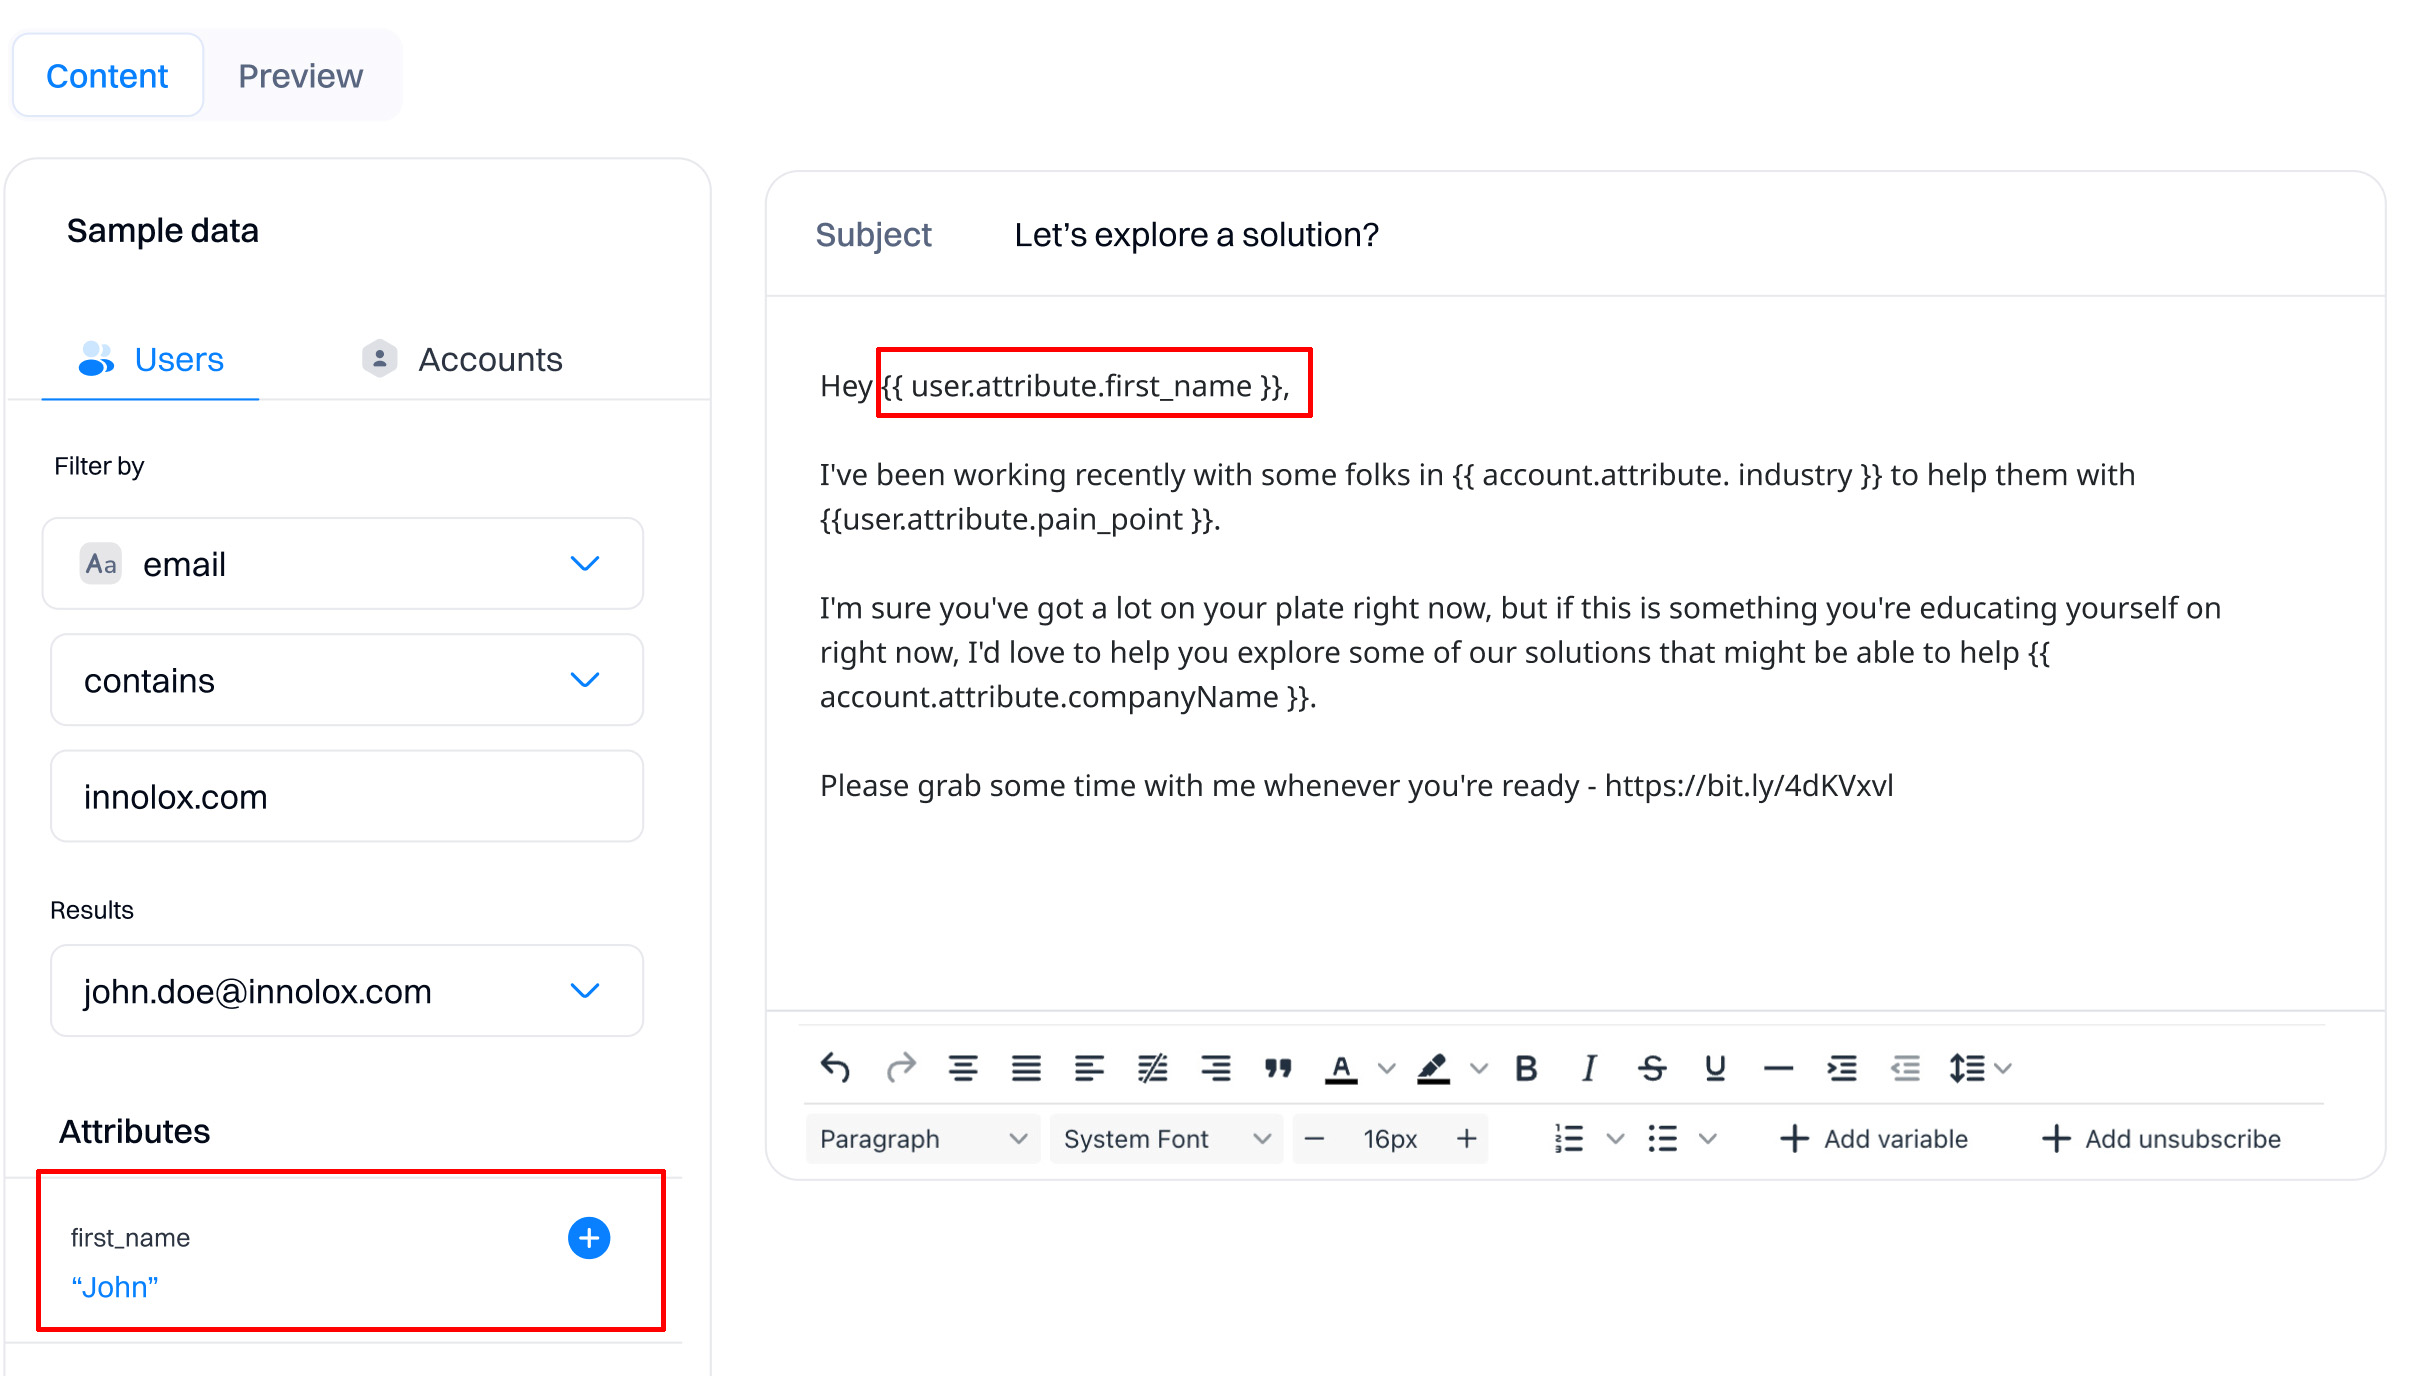
- Subject. The email's subject will be used as the default subject when using the "Send email" action in journeys.
- Message body. Here, you need to enter and edit the content of the email.
- Add variable. This opens a modal to add the user's or account variable (like the first name). This is the same action as the plus icon under the "Attributes" section but does not require filtering, presenting all variables in a single list.
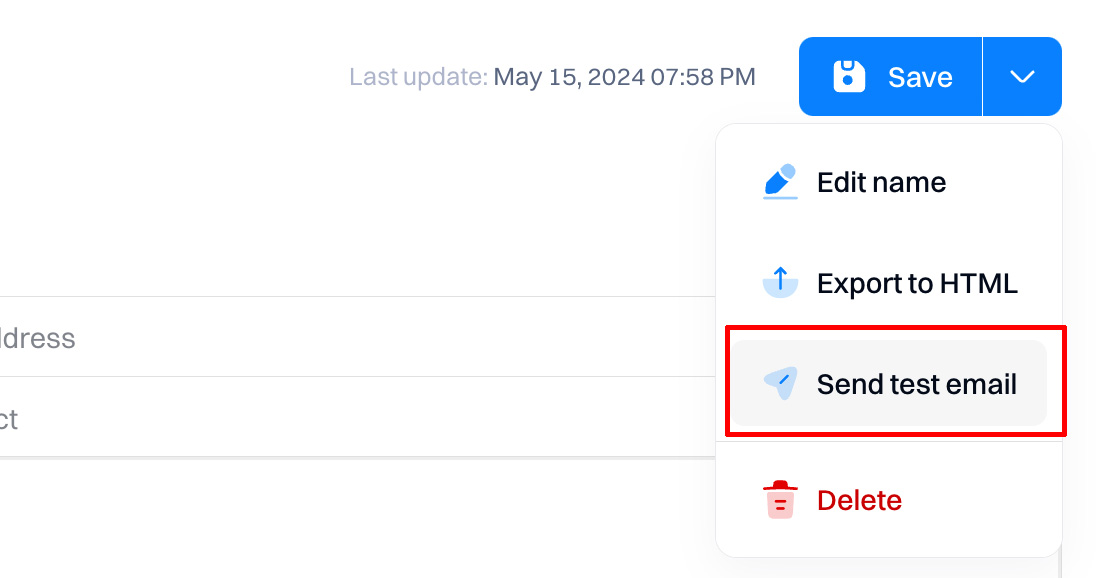
Send a test email
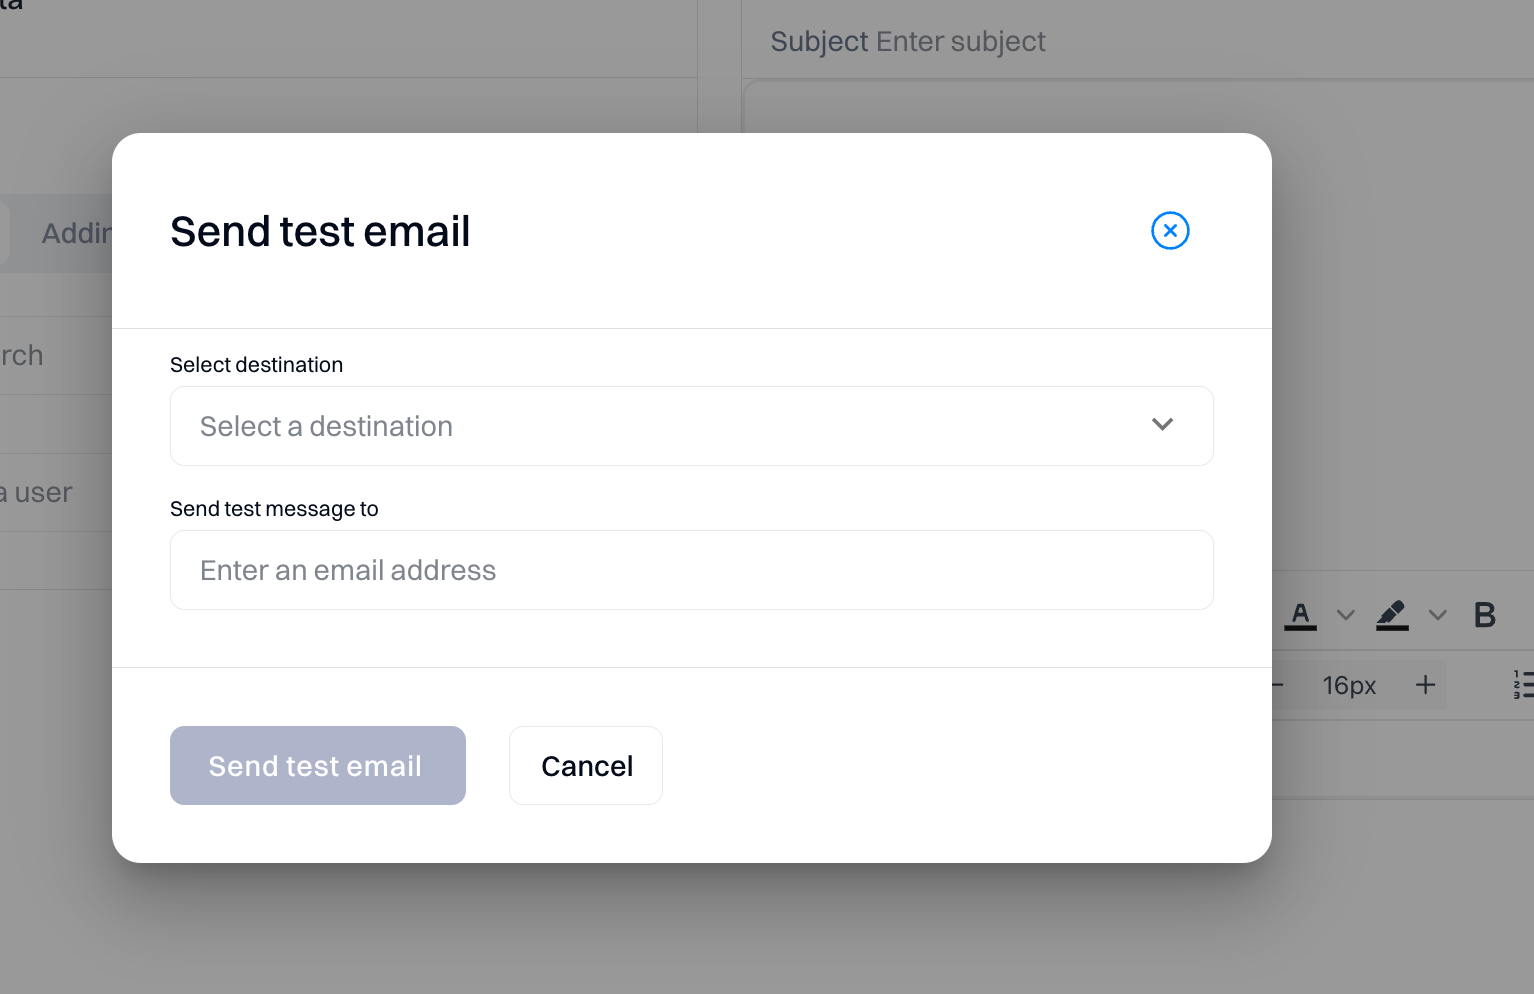
You can test how the email will render on the browser with the "Send test email" option.
To send the test email, you must select your email destination and the email address to which you will send the test.
Updated 8 months ago