
Creating a journey
Overview
Journeys is a campaign and workflow planning-execution tool in Intempt. It empowers you to design and automate flows, guiding customers through interactions with your brand.
How it works
Users enter a journey when they meet the trigger conditions (e.g., "Added to cart"). After that, different journey actions, conditions, and controls will impact their experience in achieving the journey goal (e.g., "Place an order"). Depending on your goal and exit criteria, users can exit the journey early if they reach the journey goals before completing it.
To summarize, journeys consist of these parts:
-
Triggers: This determines who enters your journey and when. You can set filters, frequency settings, and triggers to define who can enter your journey and how often.
-
Actions. These are messaging actions like email and SMS that engage the users.
-
Conditions. These are yes/no checkpoints in your journey that help you branch the flow to the appropriate experiences.
-
Controls. Determine the duration over which the user should stay/leave a journey step.
-
Goal and exit criteria: The goal is the outcome you want to achieve through the journey. Exit conditions determine if users should leave their journey early or not. You don’t need to define a goal, but it can be helpful to gauge the success and health of your journeys.
Getting started
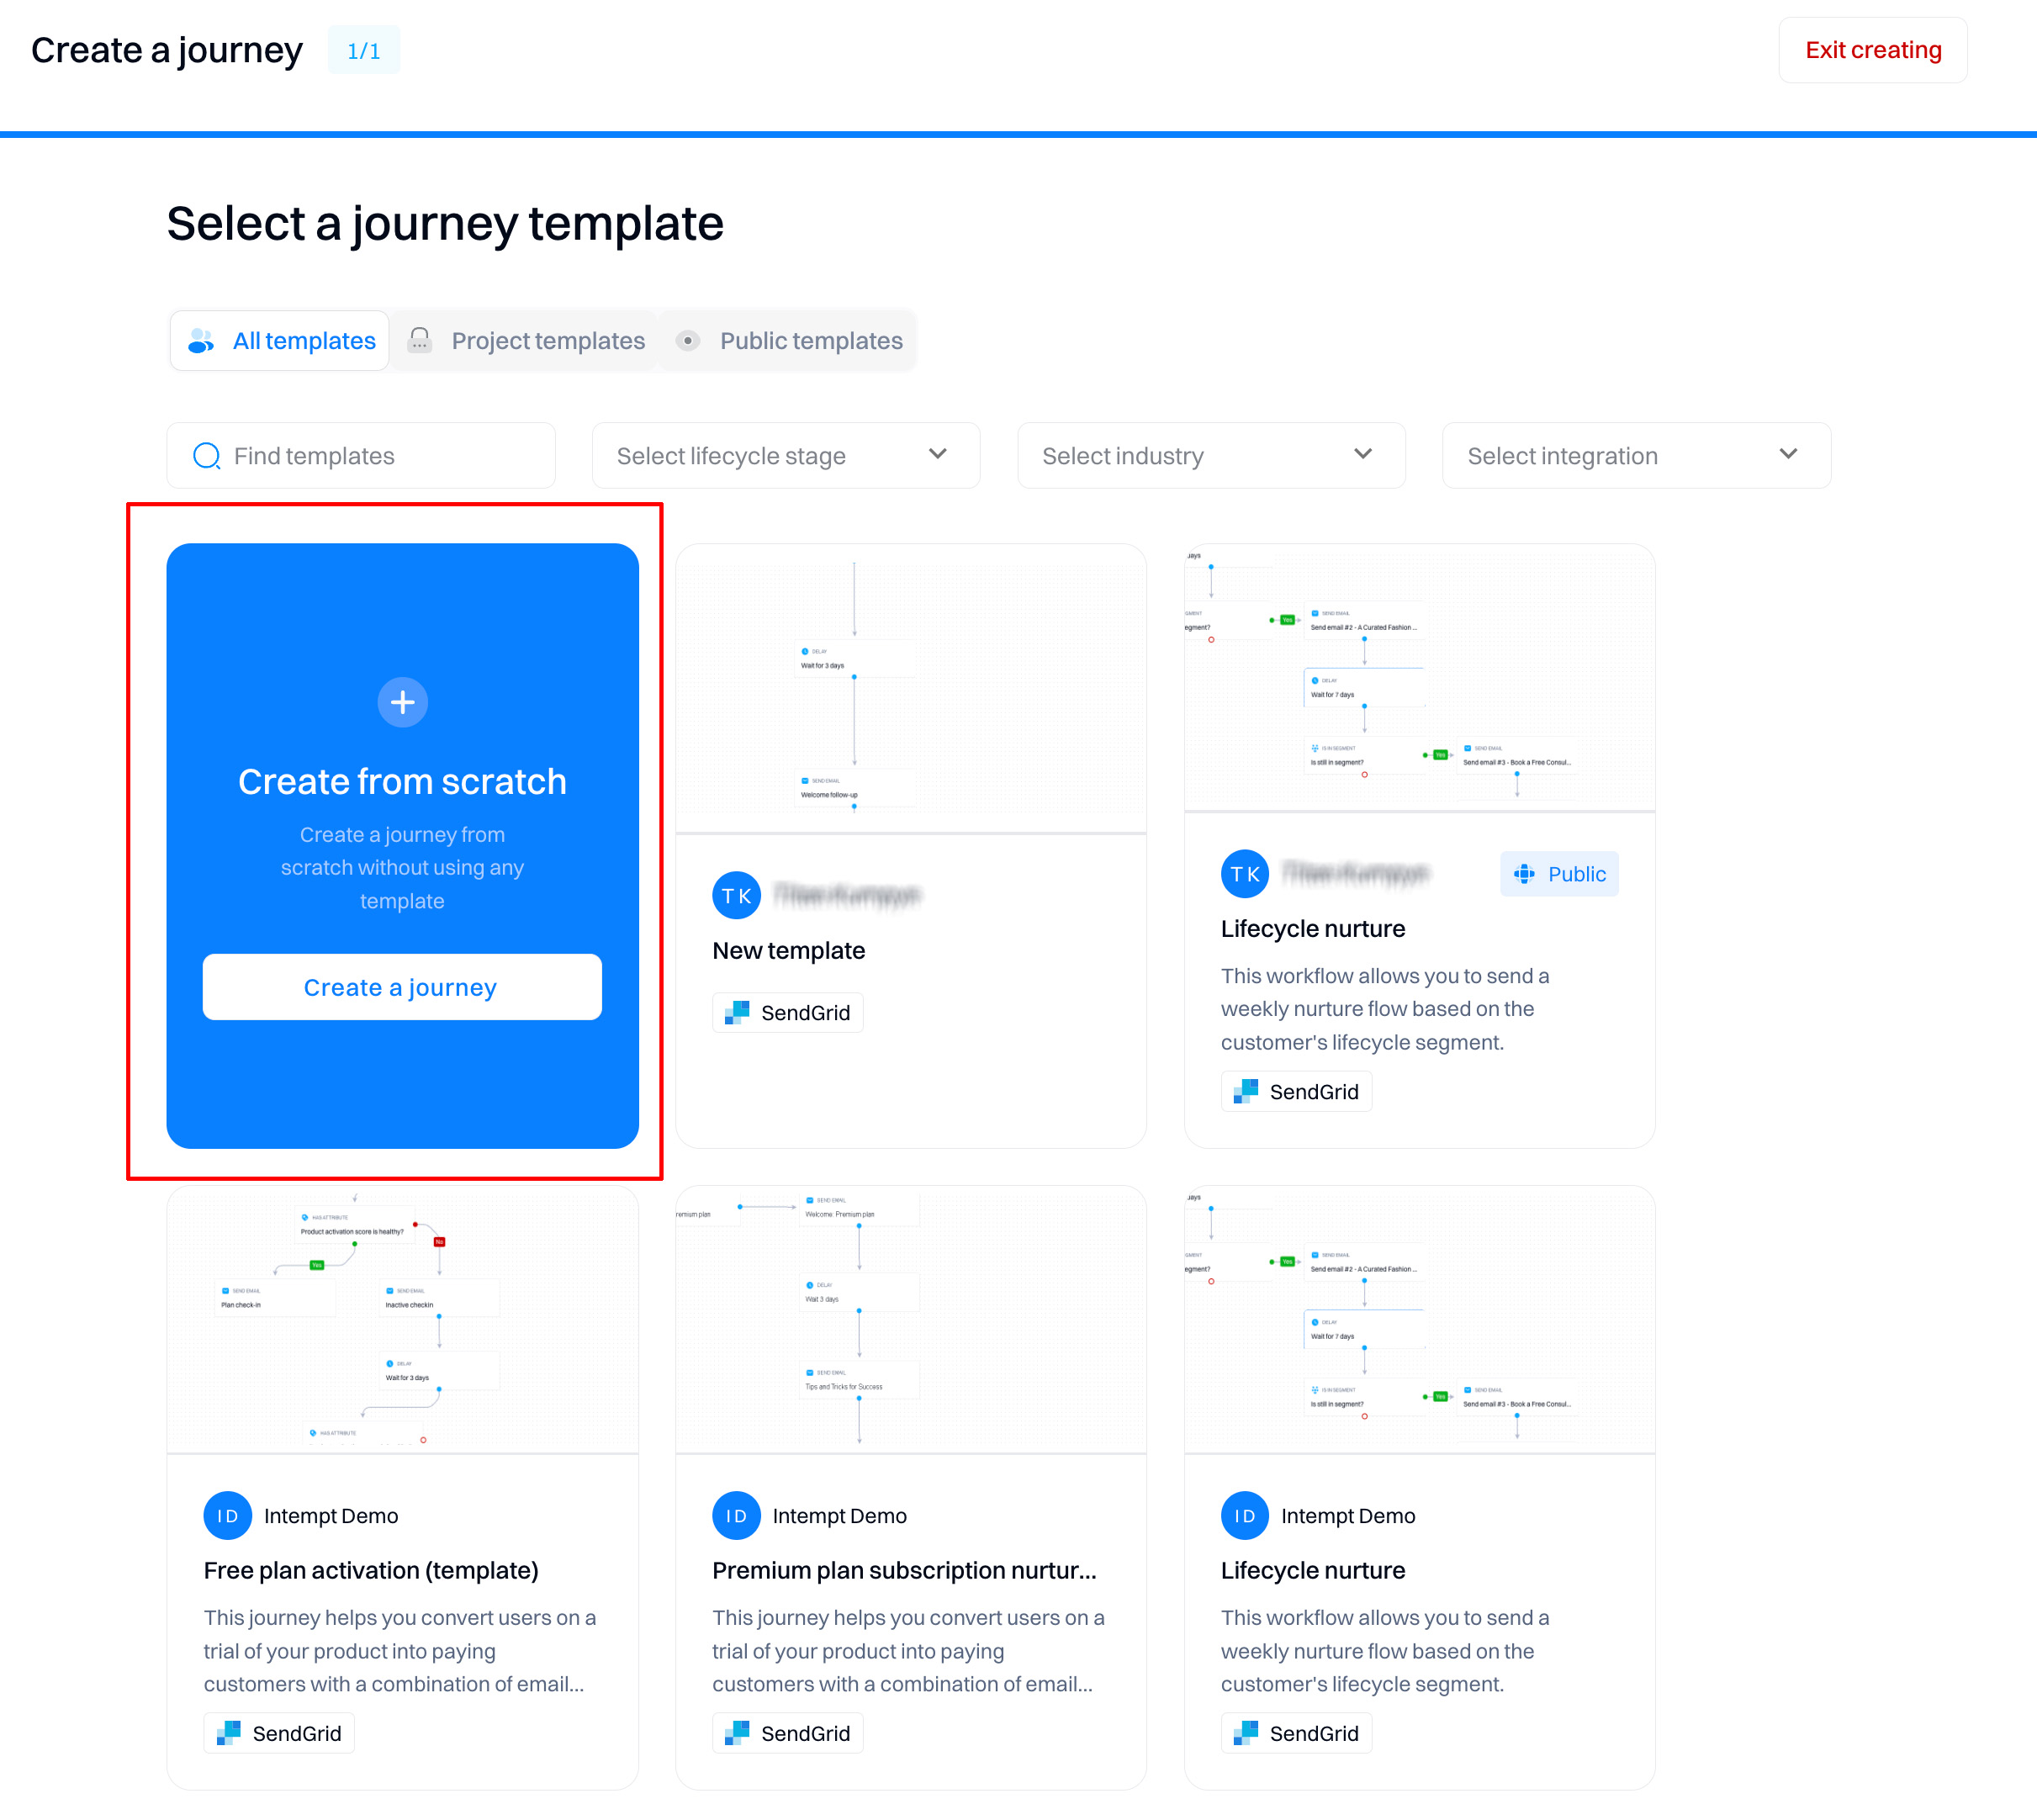
Go to Journeys and select "Create journey."

You can create the journey from scratch or via a template.
Good to know
Refer to Journey templates for a complete guide on creating and using templates.
UI overview
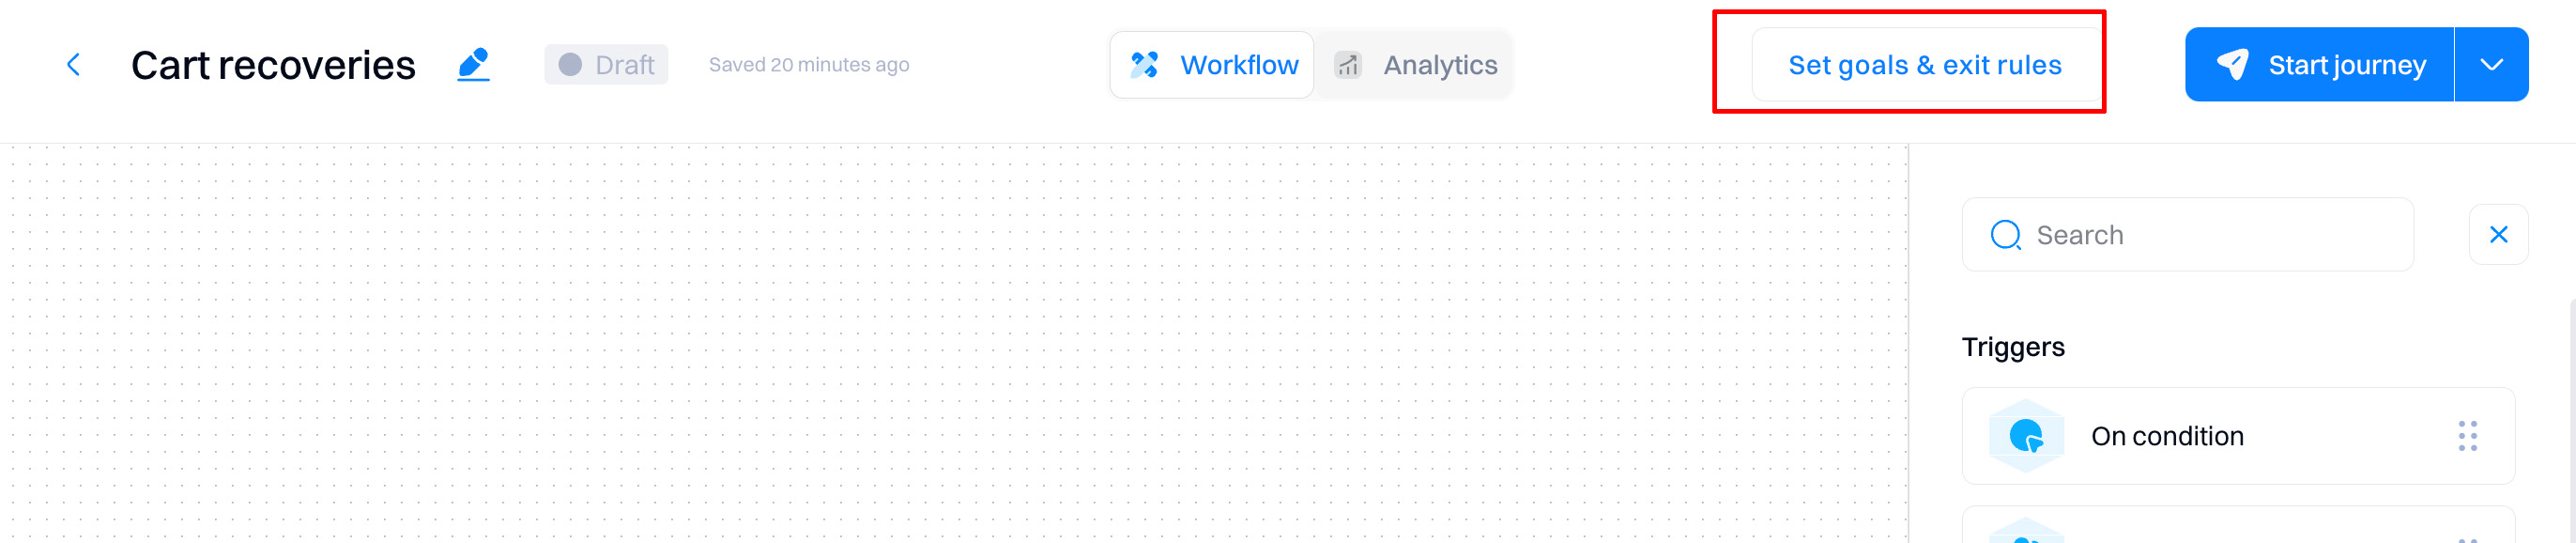
Below is an overview of the UI after you select the "Create from scratch" option.
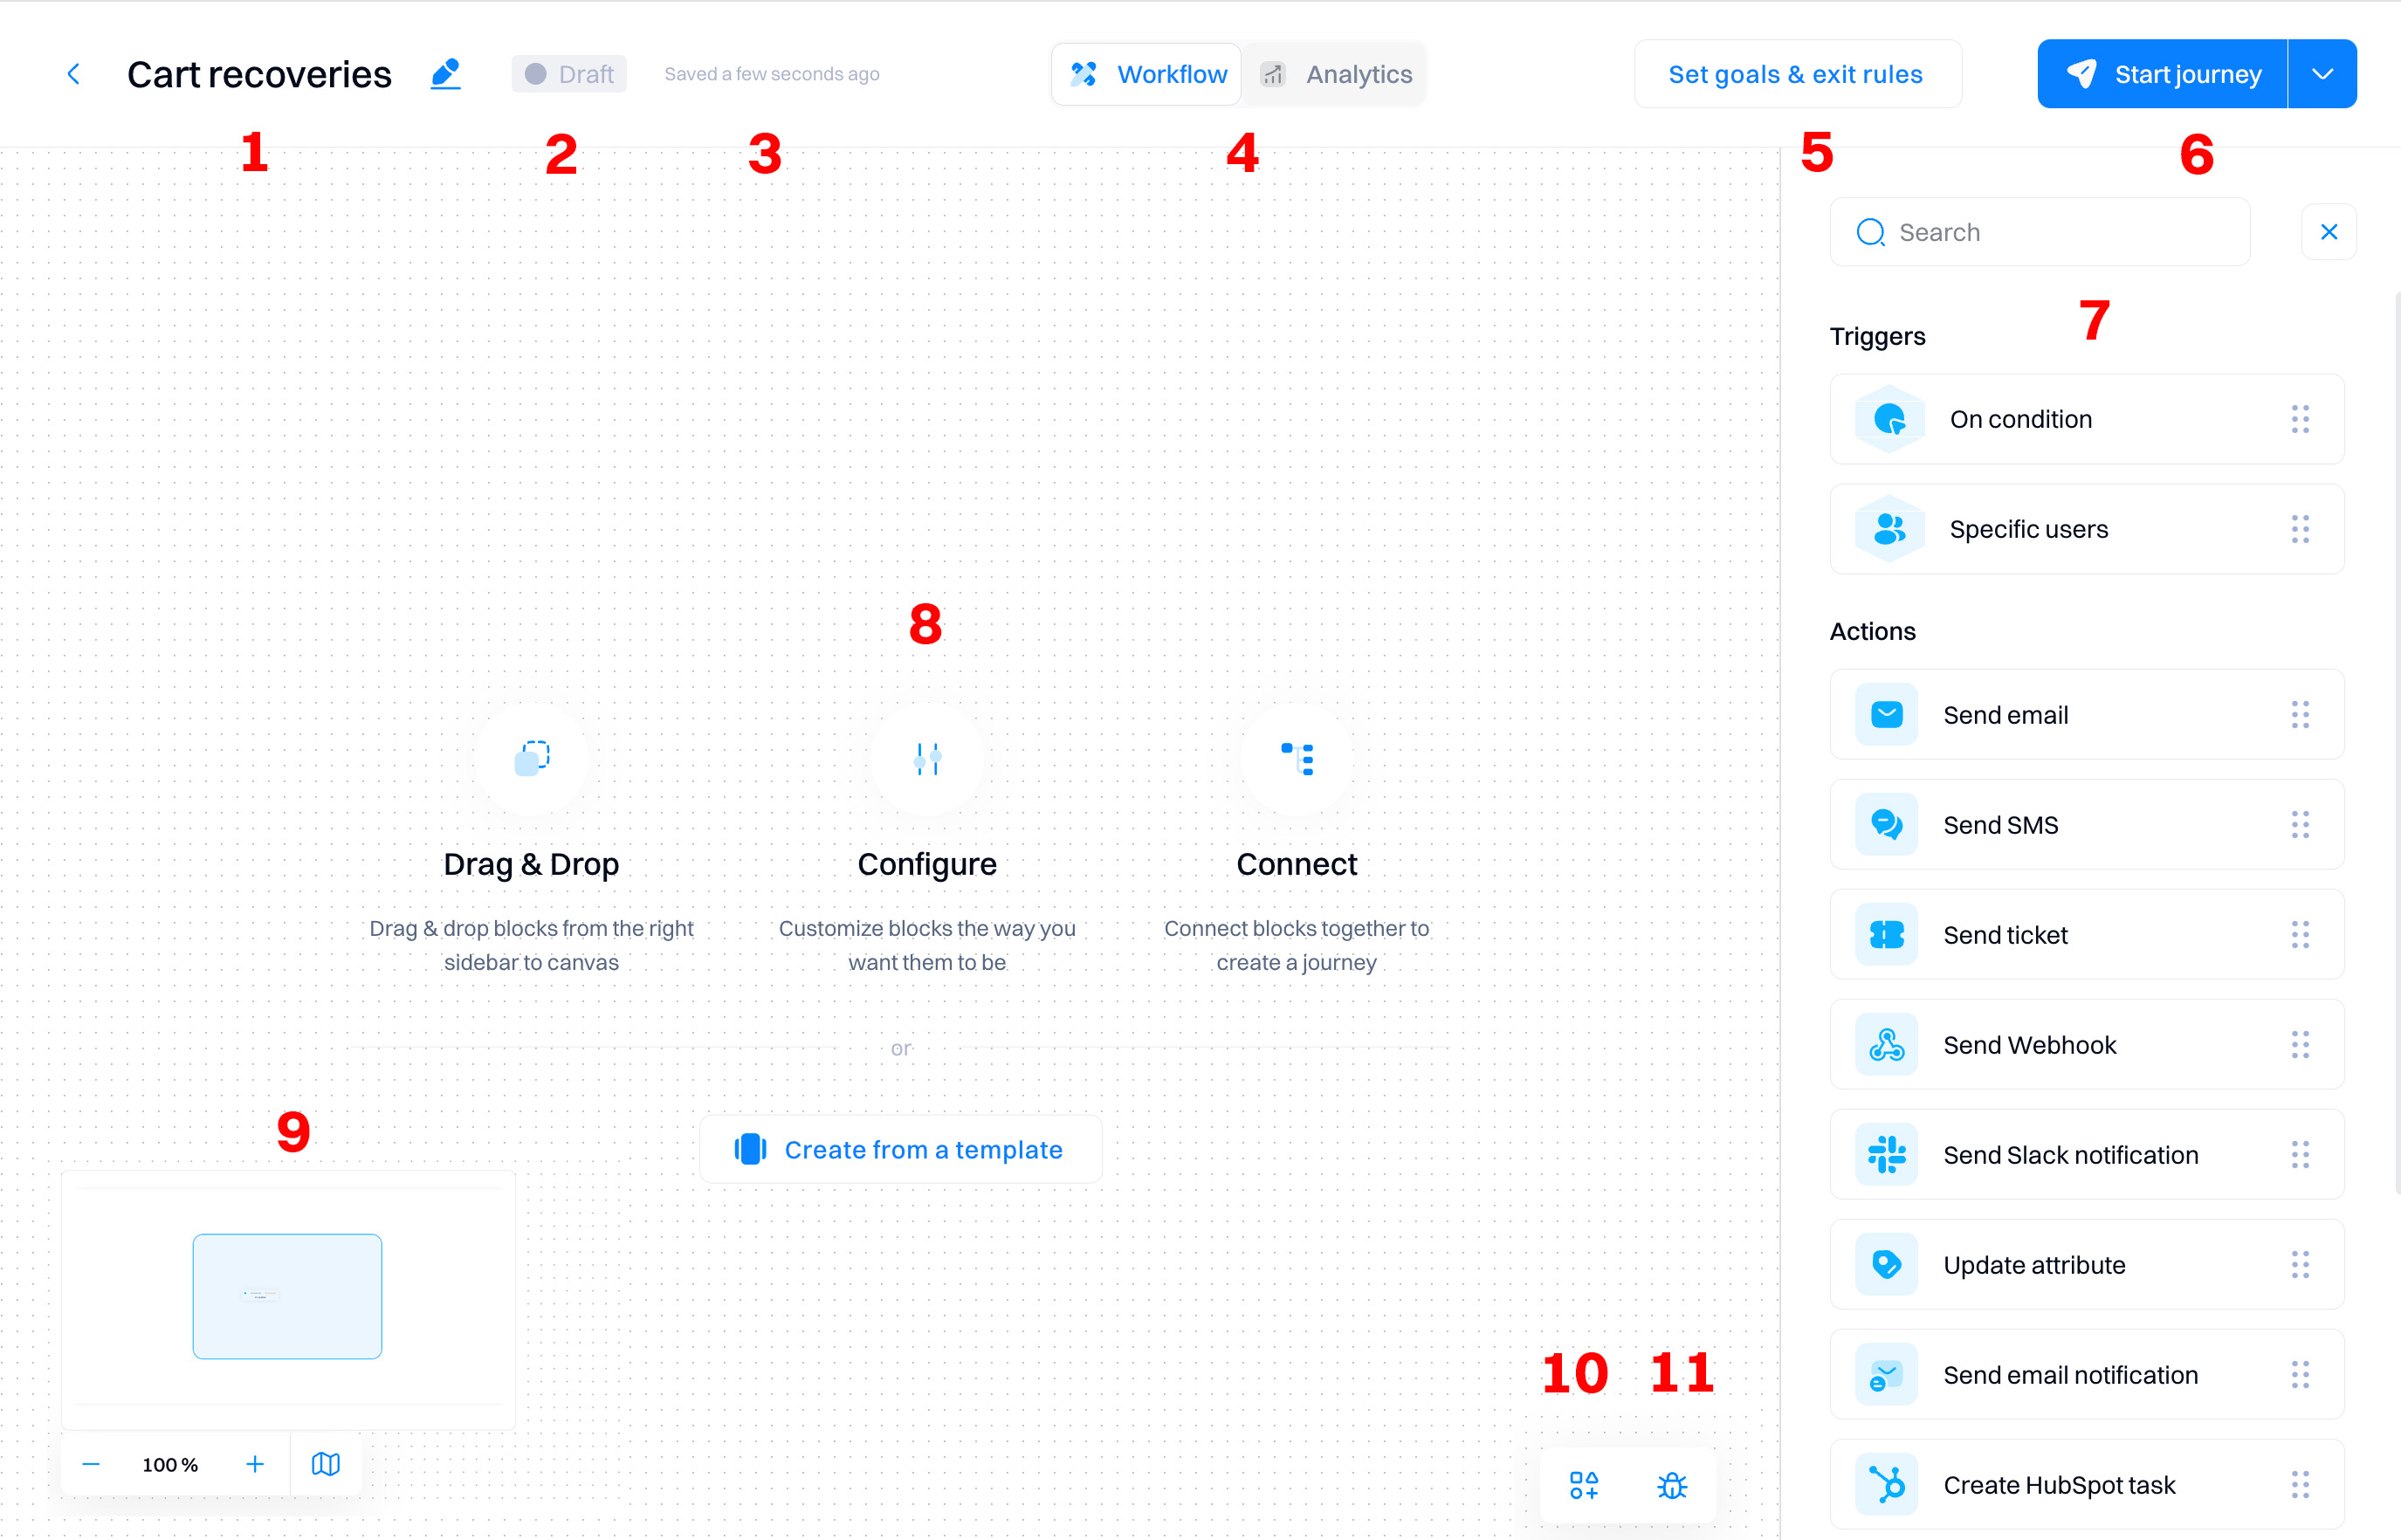
- Name of the journey. You can edit the name by clicking on the pencil icon.
- Journey status. Indicates the journey's status. Refer to Managing a journey for a complete explanation of each status indicator.
- Last updated. Indicates the time when the journey was last saved.
- View tabs. Tab switcher between analytics and workflow builder view.
- Set goals and exit rules. Configure your journey's goals and exit rules to evaluate its performance after it runs.
- Action button. This depends on the journey status: If the journey is "Draft," you will see the option to "Start the journey." If the journey is running, you will see the option to "Edit." If you are editing the journey, you will see the option to "Re-publish."
- Journey blocks. These are the building blocks to create the journey workflow. It consists of triggers, actions, conditions, and controls.
- Canvas. The area where you drop the blocks and create connections.
- Minimap. Allows you to zoom in/zoom out within the journey view.
- Hide sidebar. After clicking, the sidebar will be hidden. Click again to start showing it again.
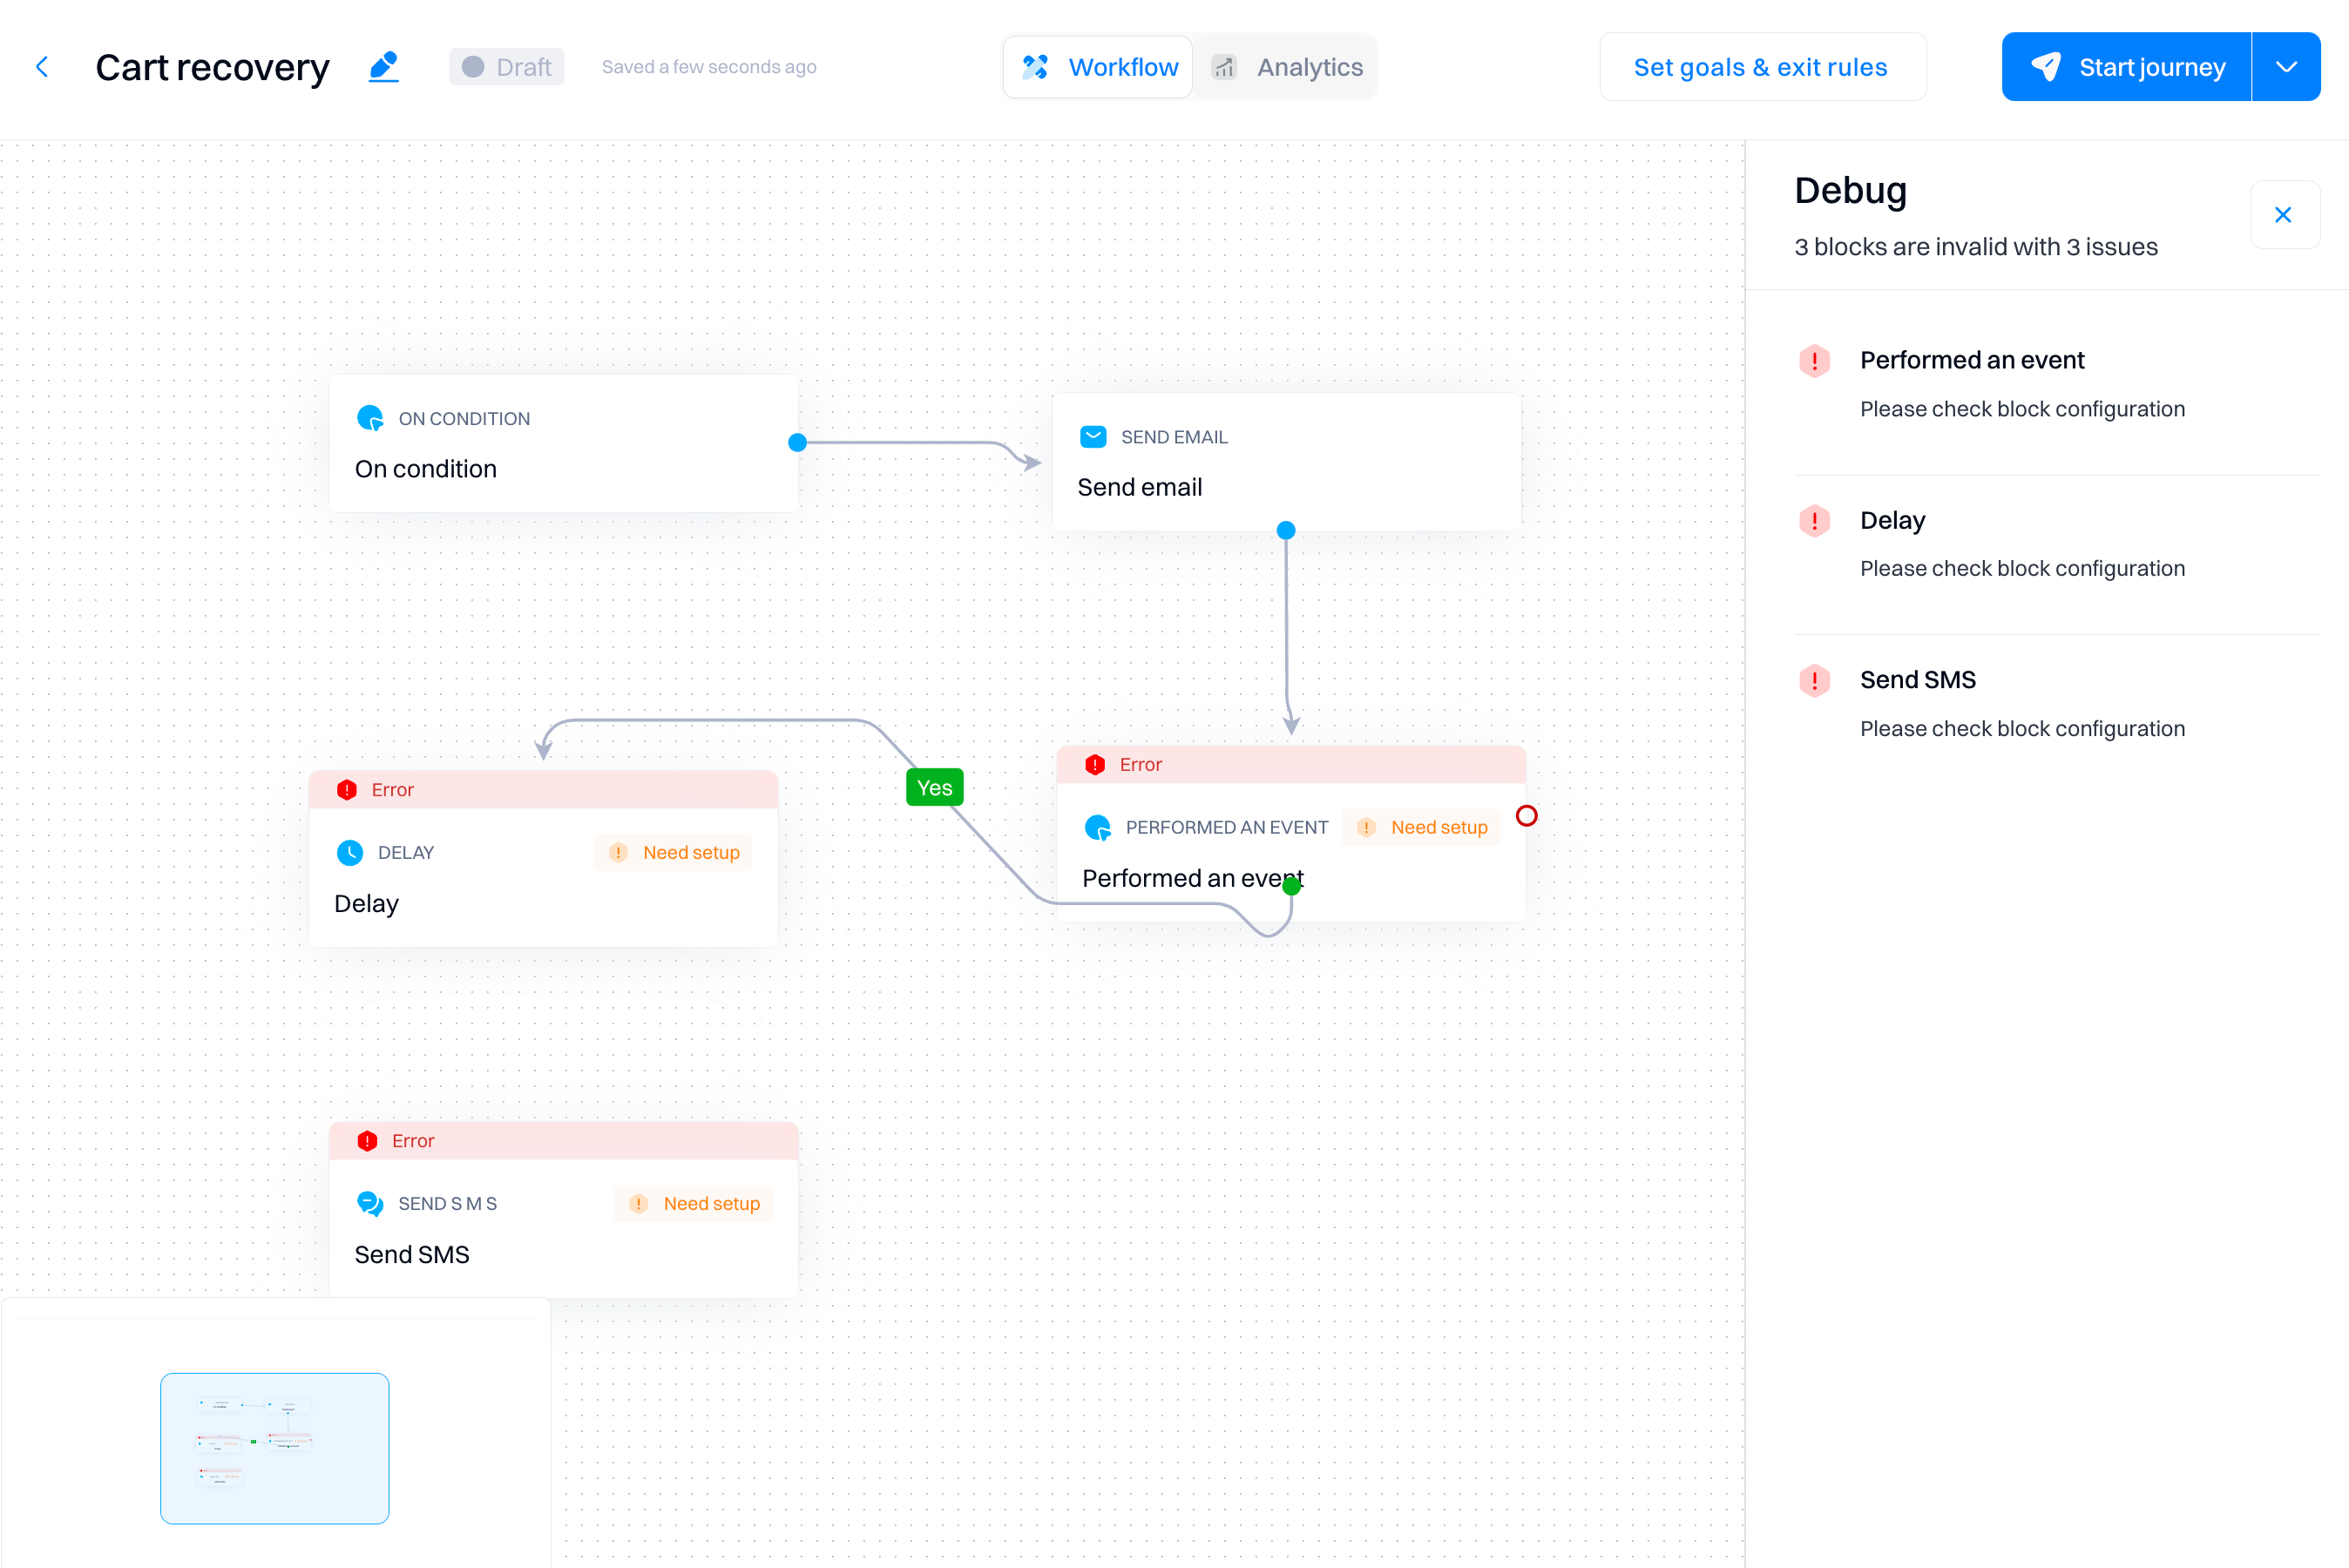
- Issues. Switches to a view where you can review if there are any issues with your journey's configuration.
Workflow creation
Building. To begin, drag & drop actions from the right sidebar to the canvas to start building the journey.
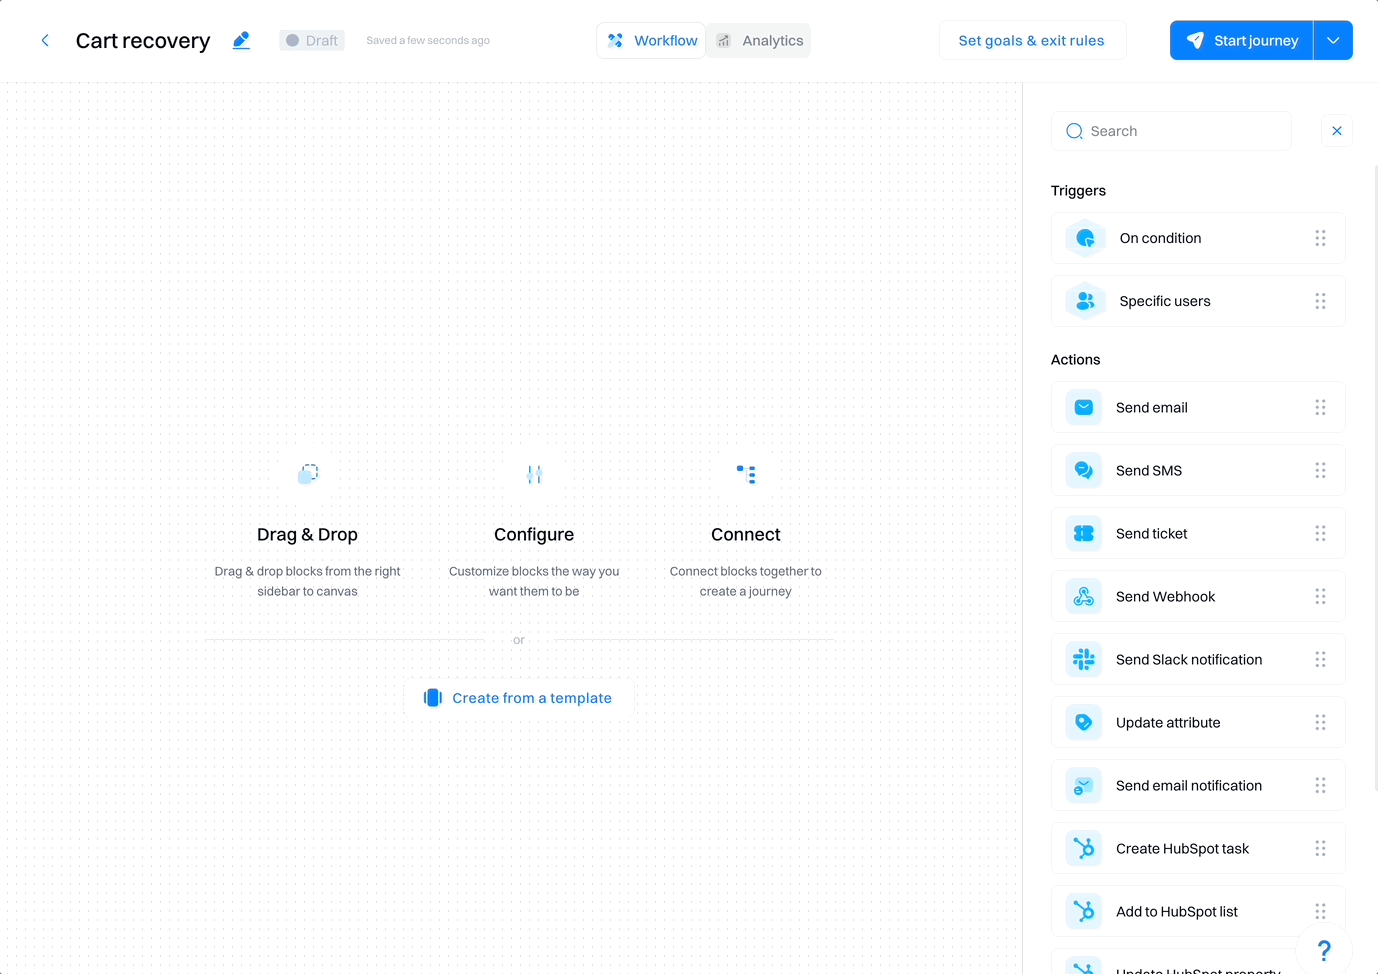
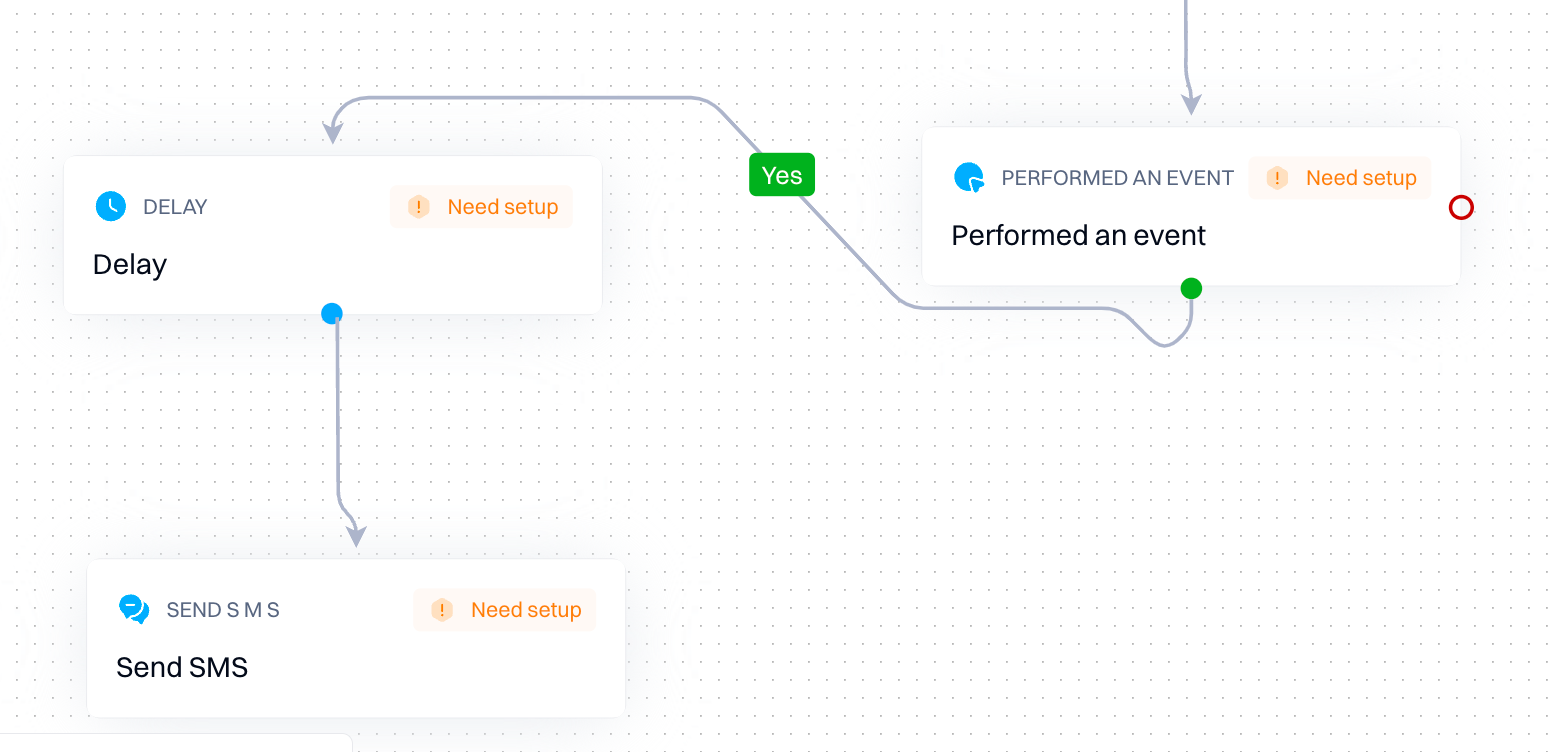
Configuring. Double-click on the block to edit its configuration.
Connecting. To connect the blocks, click on the block's connection circle and drag it to another block's connector.

Note that you can connect from two sides on any block, which gives you more flexibility in creating the visual workflow.
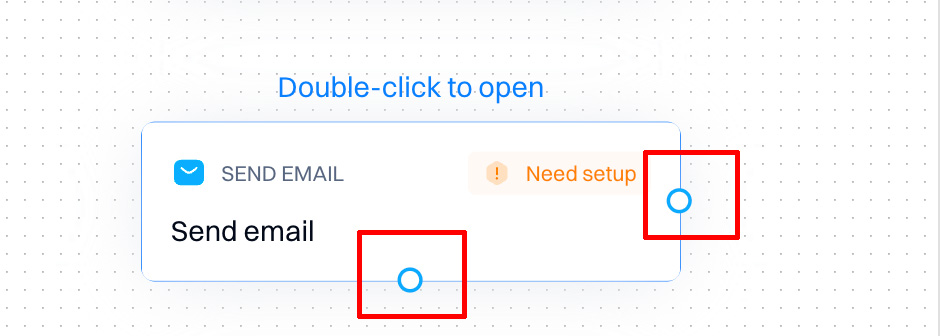
After you drag the cursor from one of the connectors, you will see the possible connection outputs.
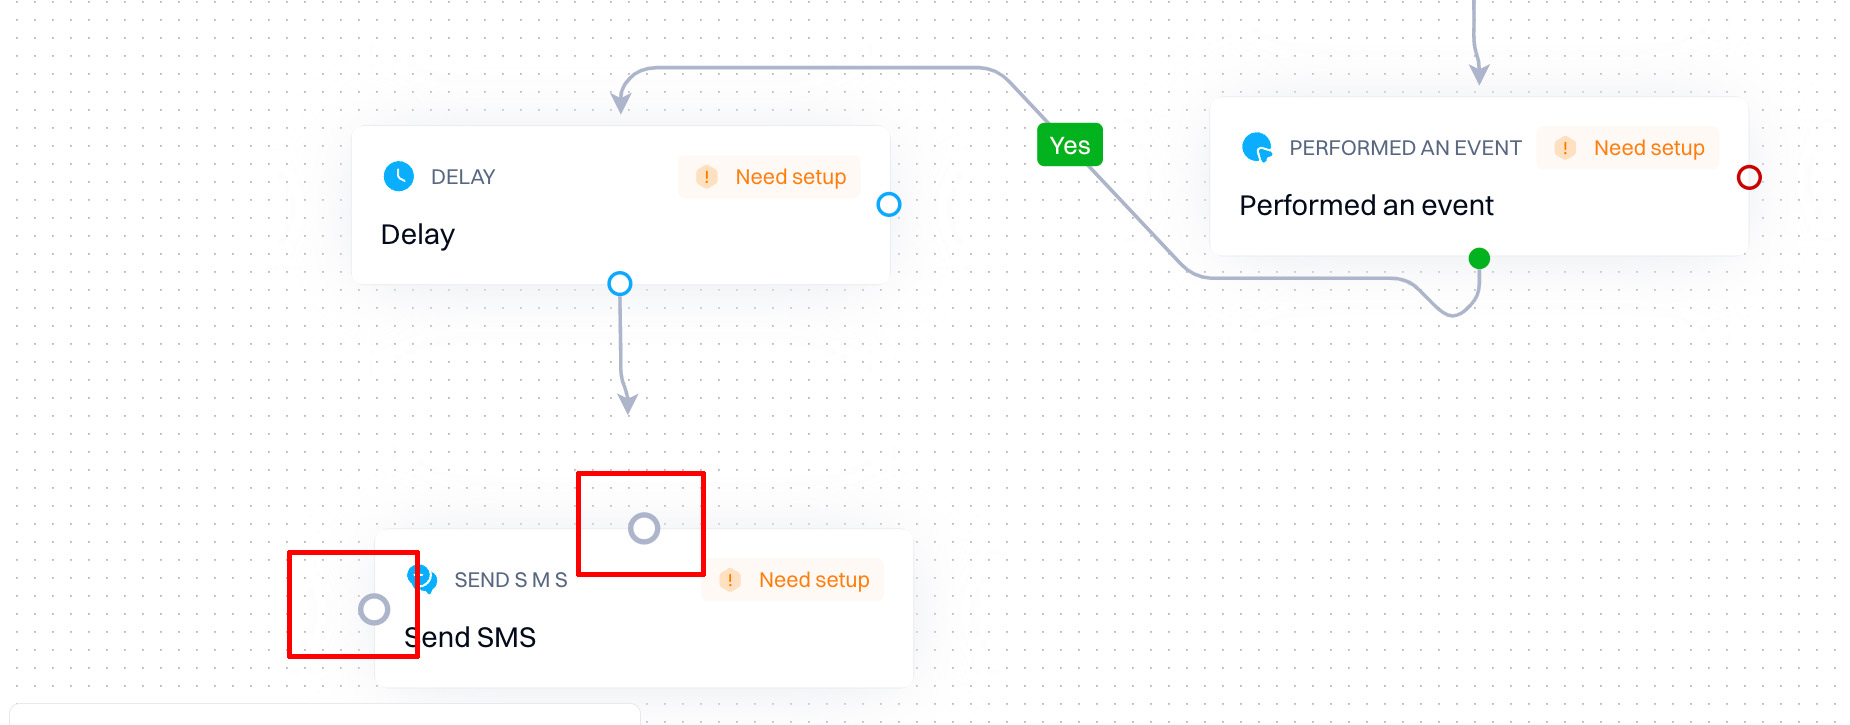
Drag to the highlighted circle to connect.
Good to know
The connector's position (bottom/right) only has an effect on the journey's visual look - it does not directly affect the functionality of the workflow.
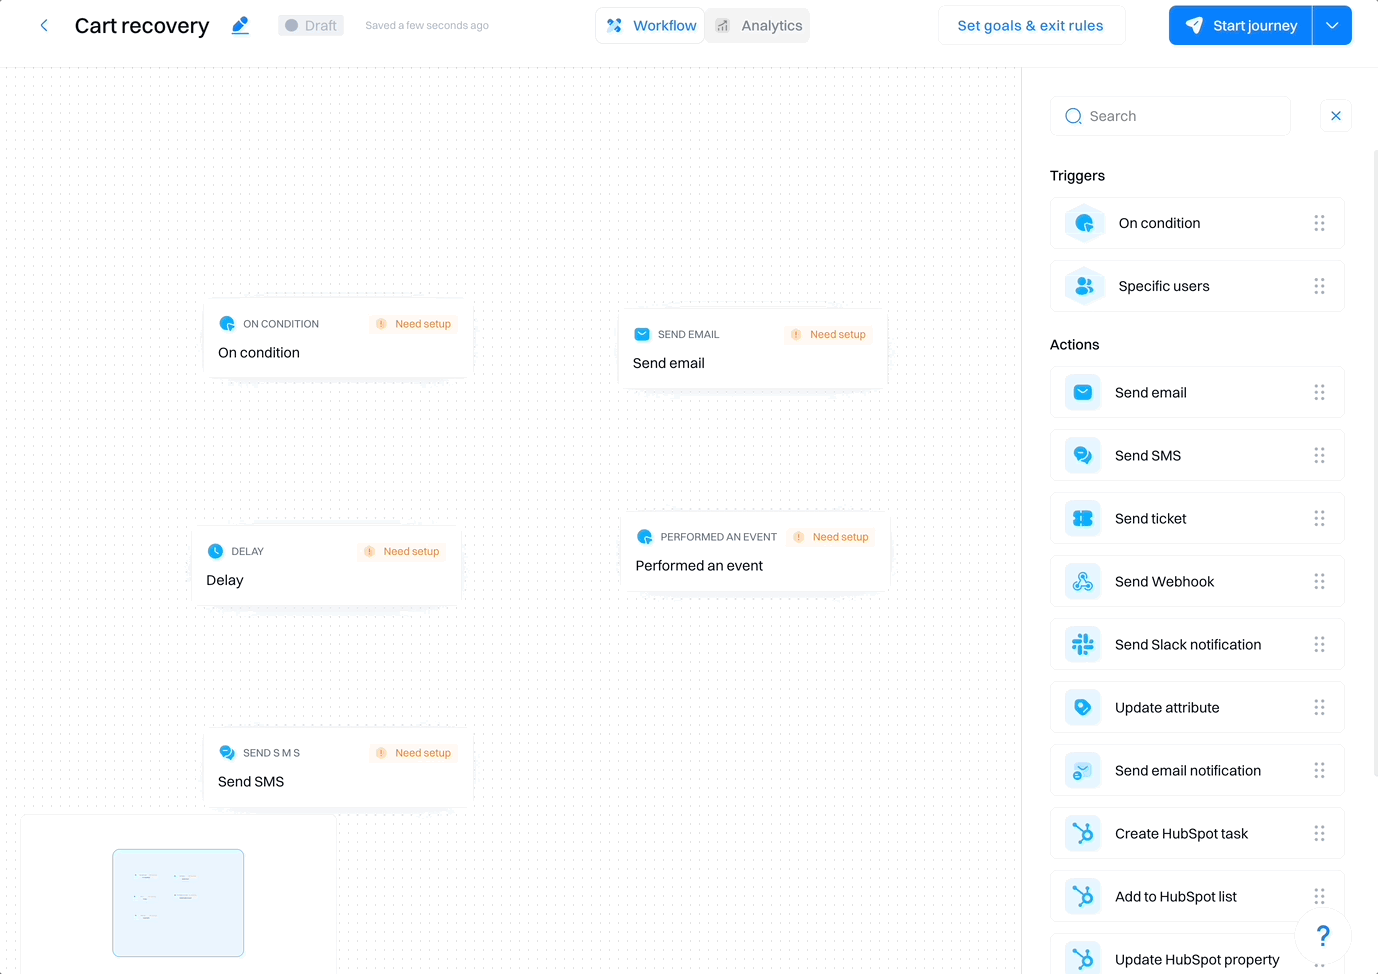
Configure the blocks
You must combine a trigger and multiple actions, conditions, and controls to create a journey workflow that maps to your use case. At a minimum, you need a trigger and an action to start a journey.
Before starting the journey, ensure that each block's configuration is complete—look for the "Need setup" callout.

Good to know
Refer to Journey blocksfor a complete overview of different types of blocks and their configuration.
Set goals and exit rules
Before starting the journey, we highly recommend setting a conversion goal and deciding whether users should exit your campaign when they achieve it.
A conversion goal measures the effectiveness of your journey, and exit criteria determine whether a user should leave.
How goals work
A conversion goal represents the outcome you want to achieve from a journey. The goal can be:
- an event you want people to perform or
- a segment you want people to join or leave
- a specific attribute value that the user or account matches
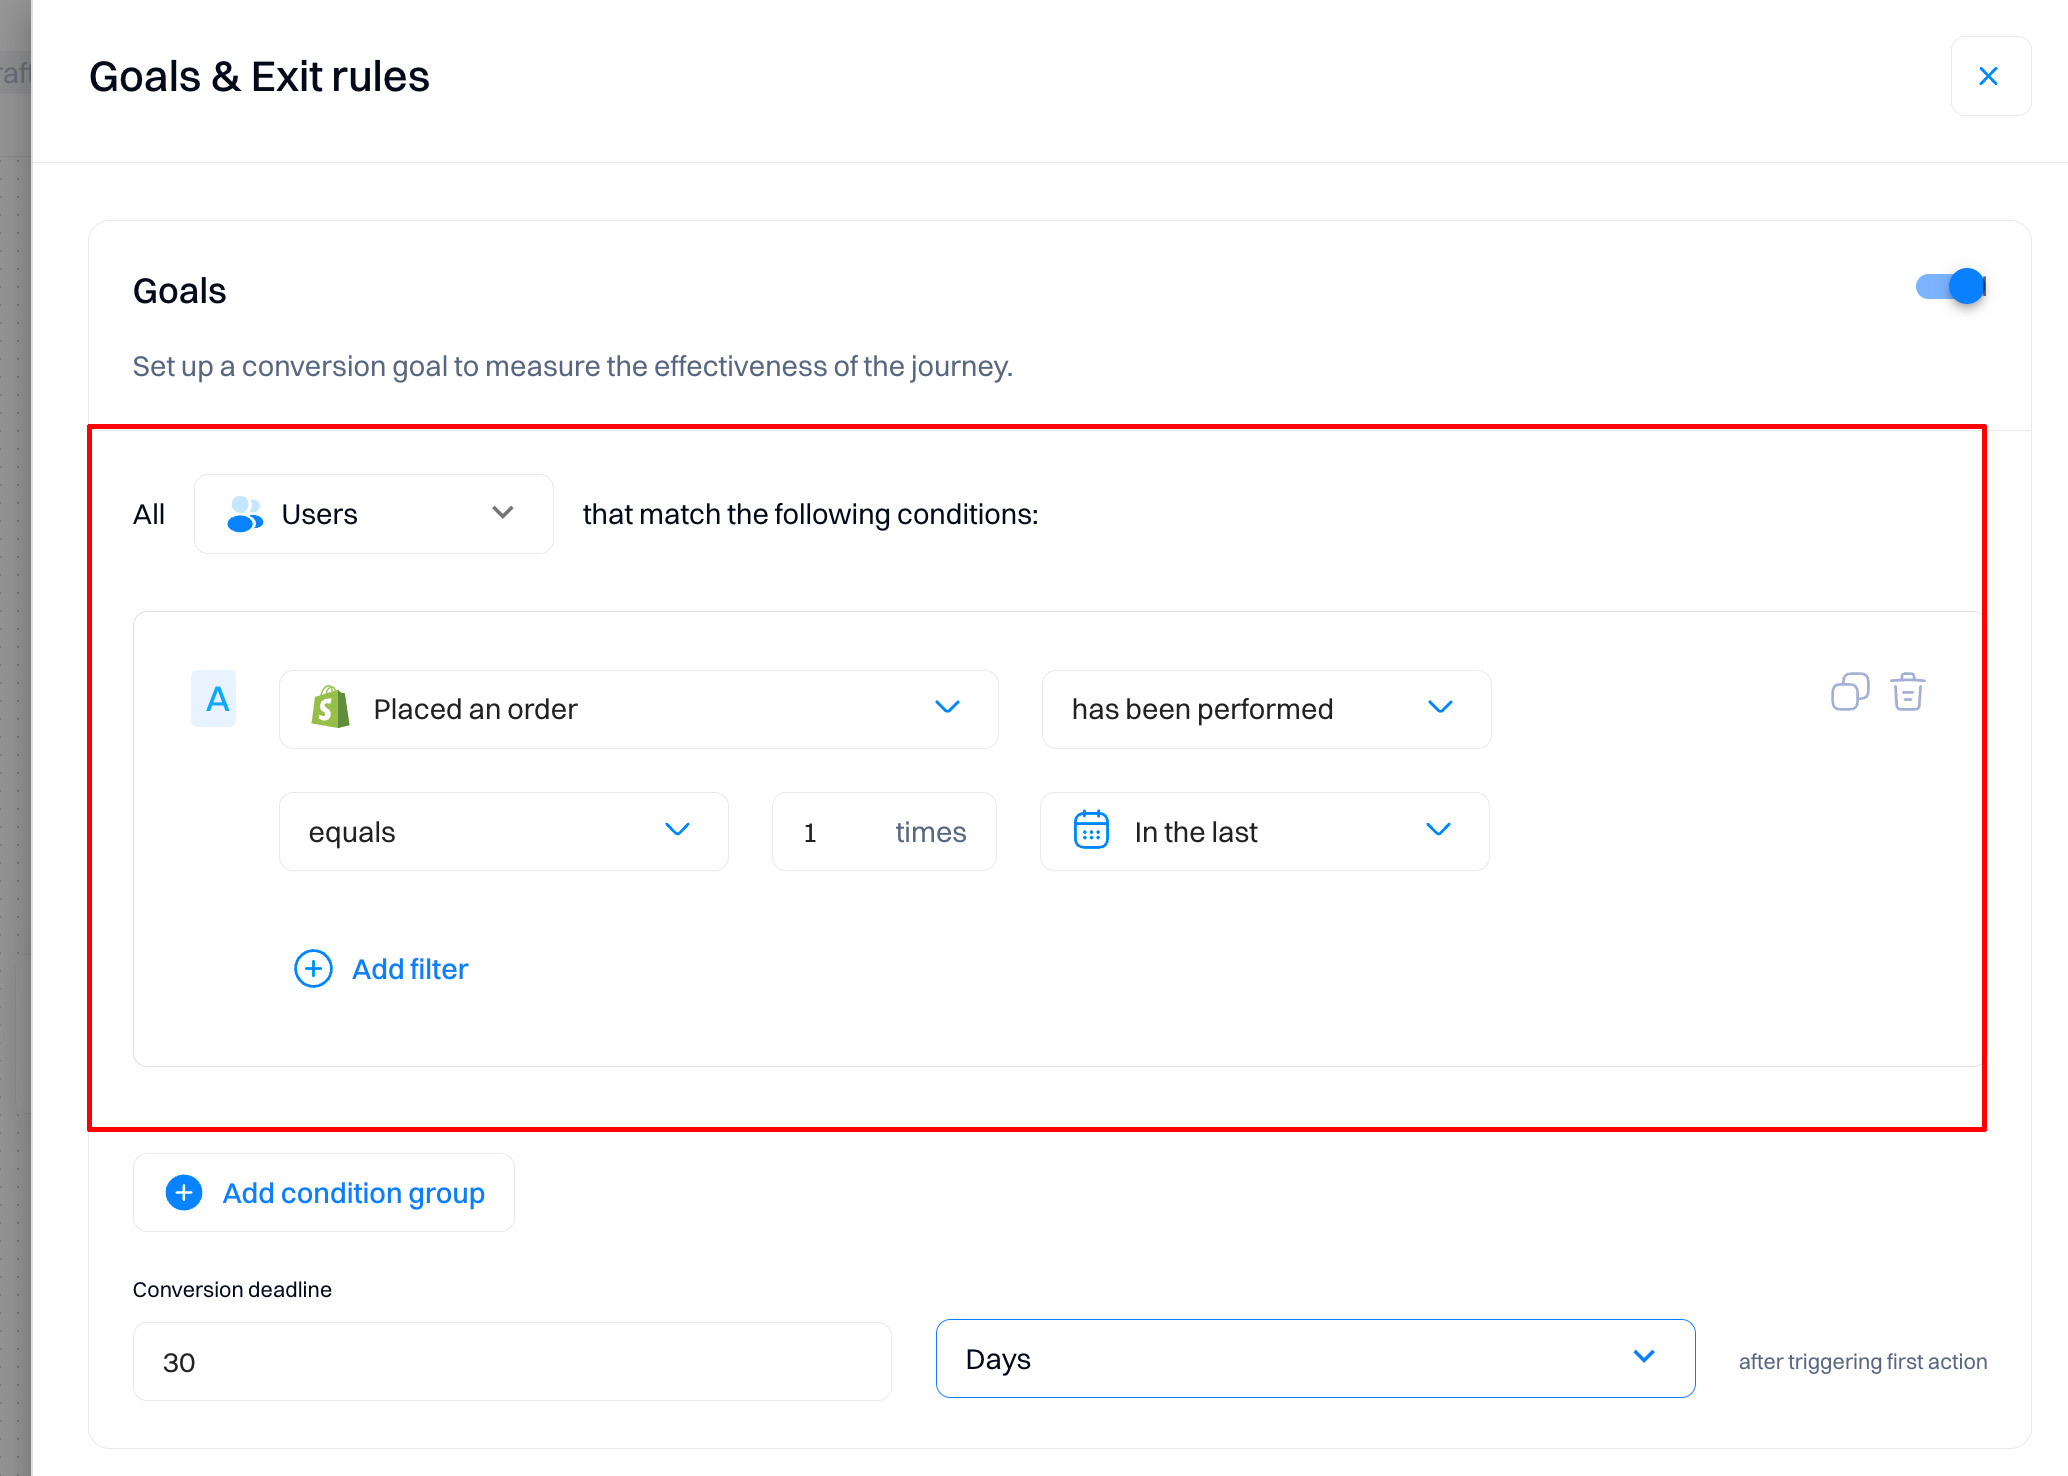
When you set a conversion goal, you also set a conversion deadline that defines when a user can achieve the goal. It can be anytime after or within a certain amount of time after they receive, open, or click a tracked link in a message. We'll record a conversion if a user meets your criteria within the conversion deadline. We won't record a conversion if a user does not meet the conversion goal or does so outside the time frame you set.
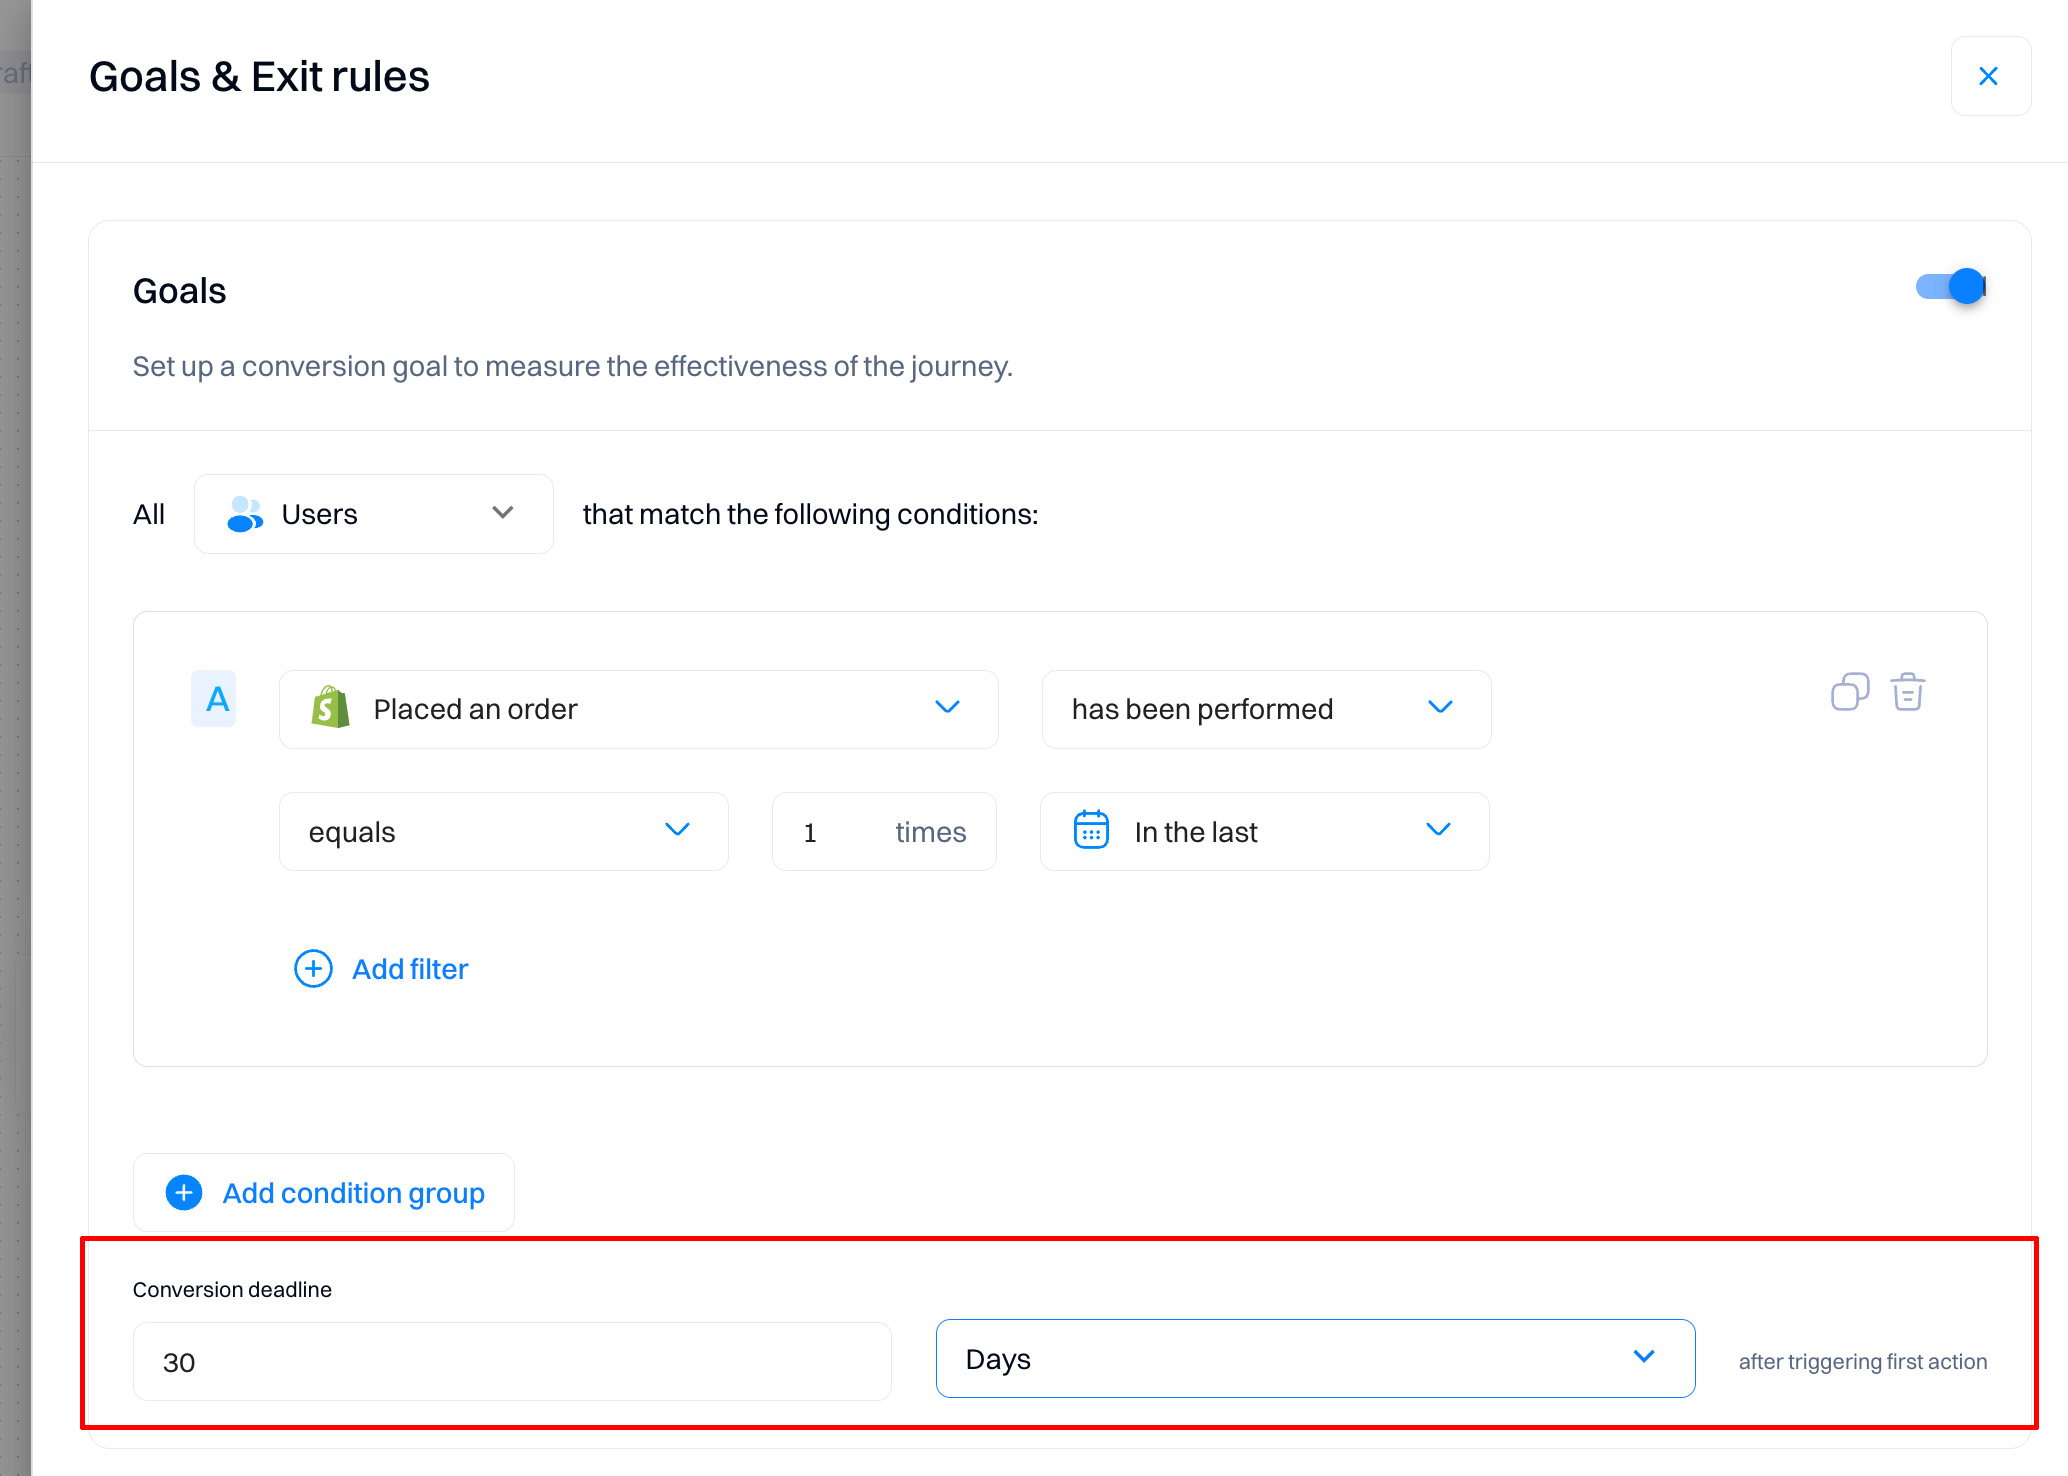
Exit rules
By default, a user continues through a journey until they stop matching the journey trigger or filter criteria—even if they perform your journey's goal action. However, you might not want users to continue a journey if they achieve the journey's goal. You can change these settings under "Goals & Exit rules" and set the criteria for the user to exit the journey.
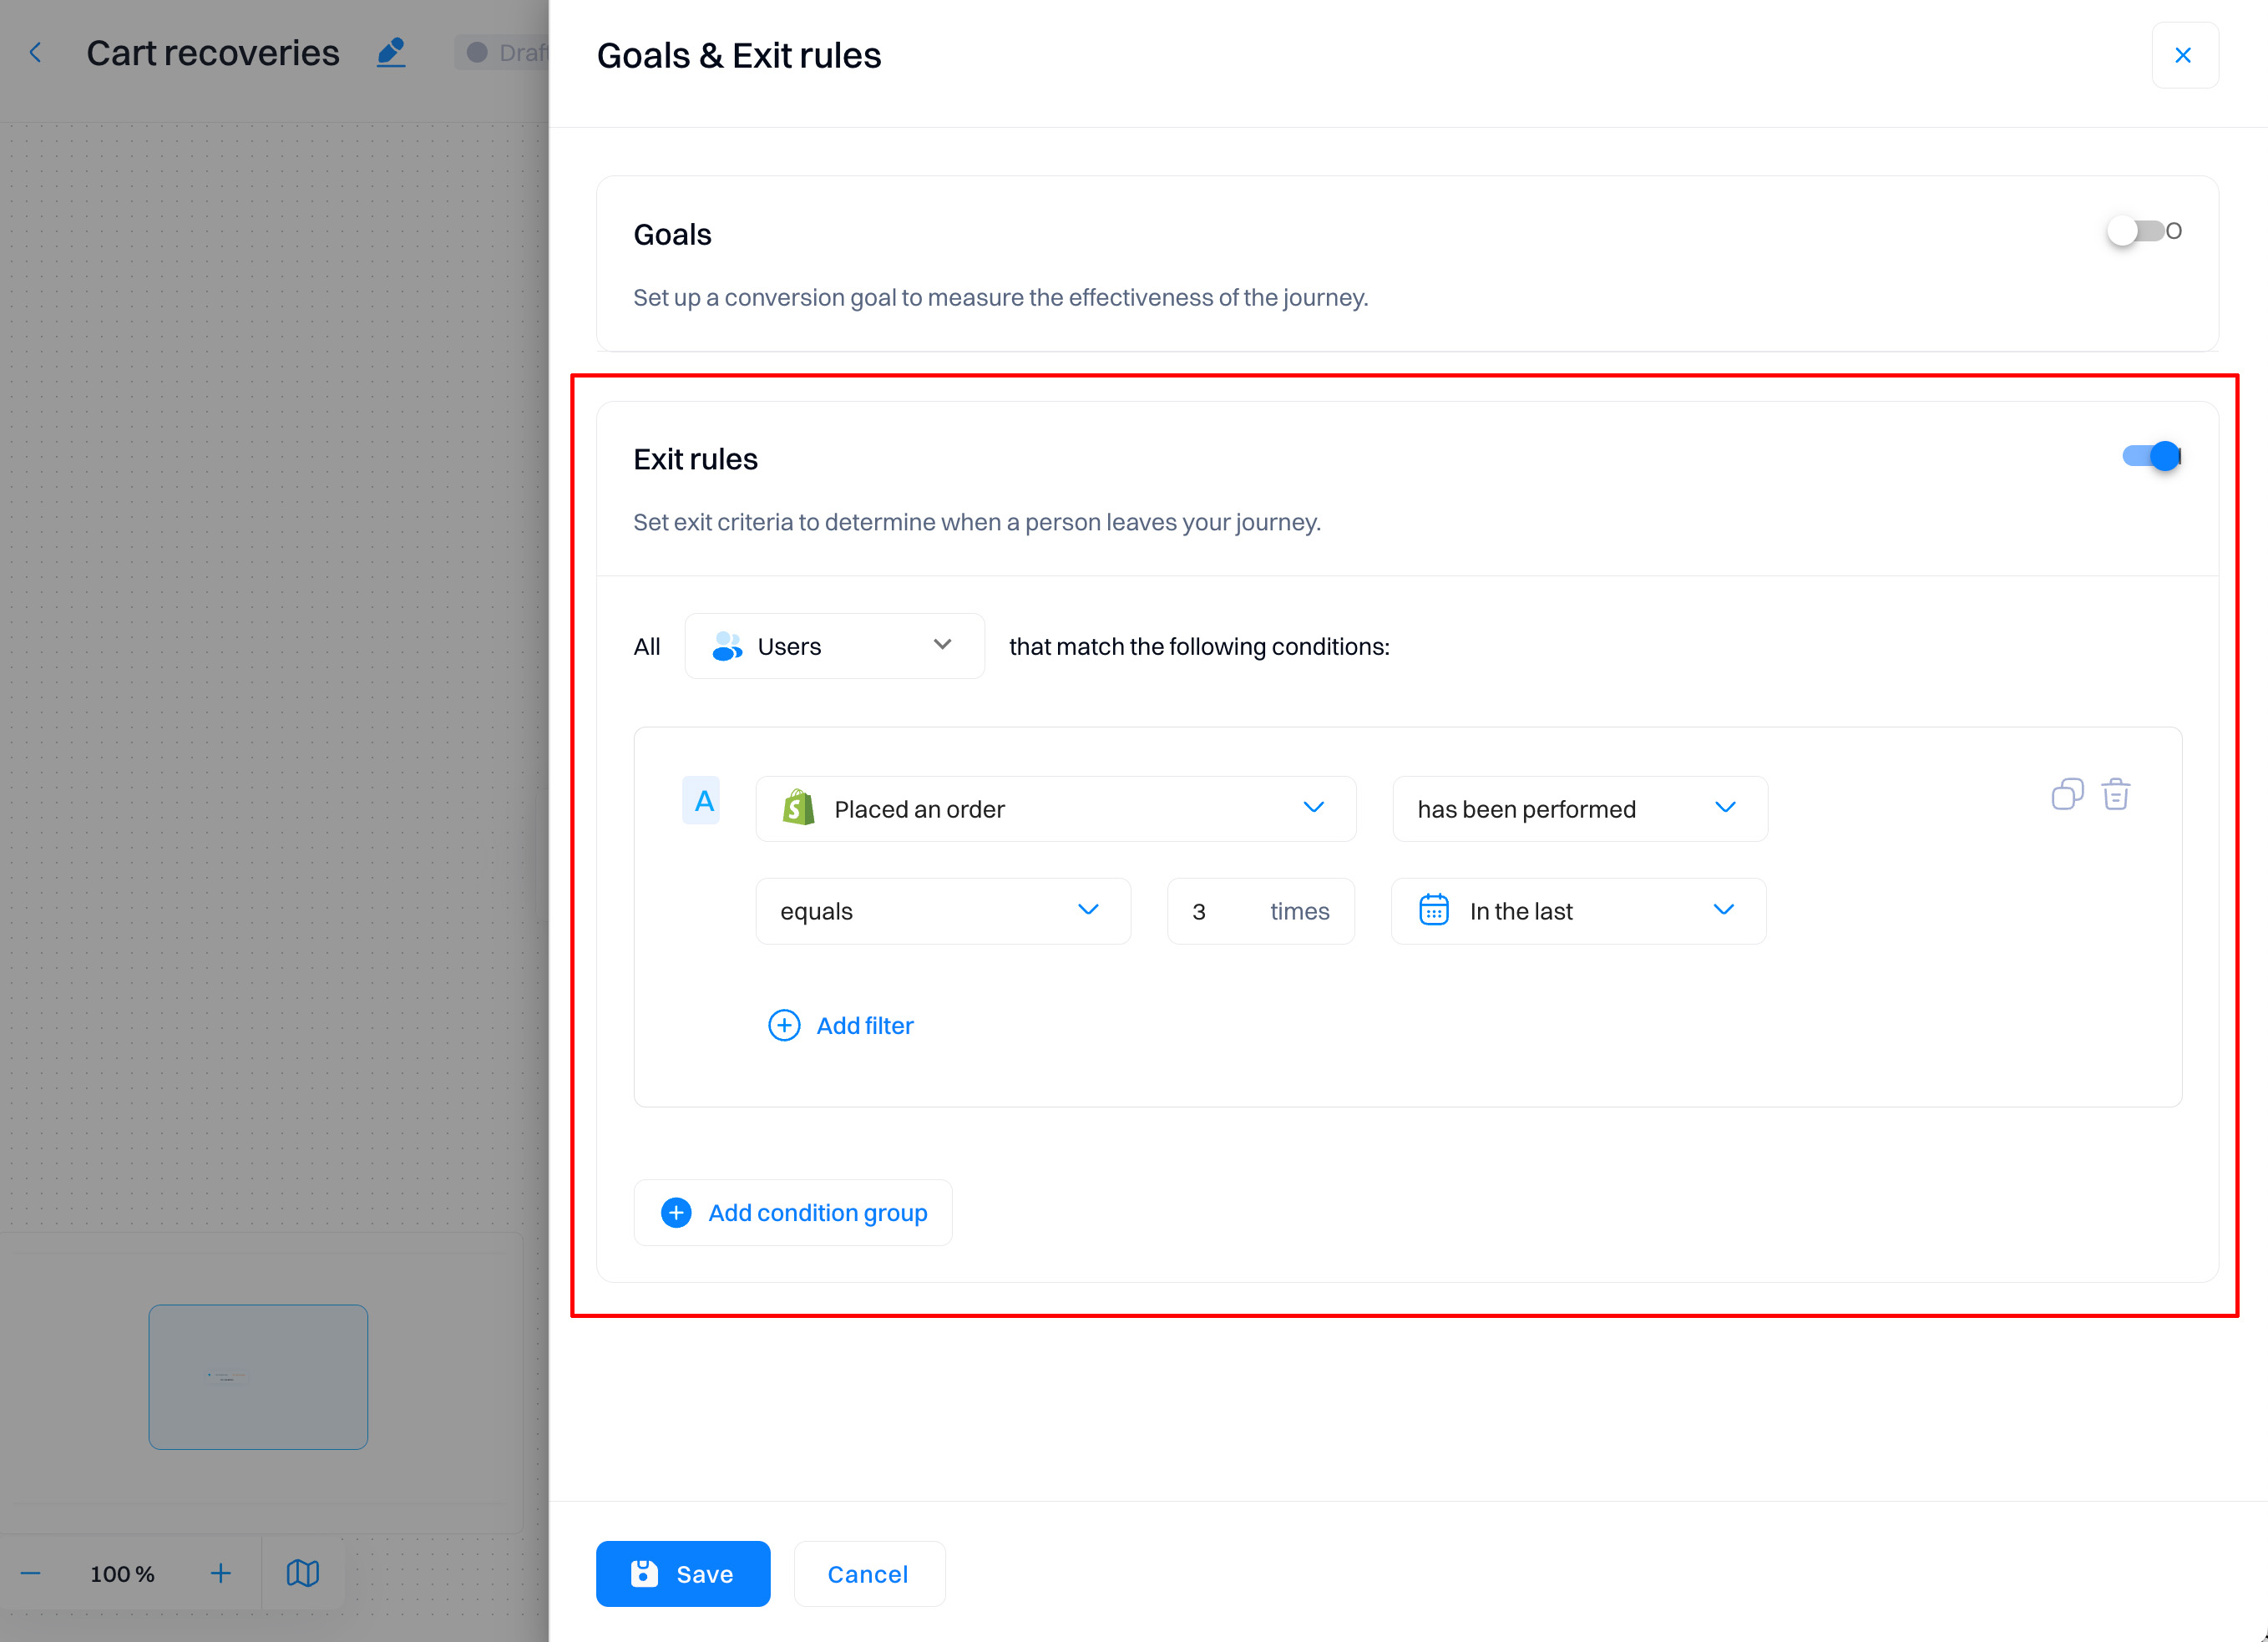
Good to know
If no exit rules are not defined, users won’t exit your campaign early. They’ll complete their entire journey, even after they meet your goal or stop matching your campaign’s trigger or filter conditions during their journey.
Starting the journey
Once you have all the journey blocks configured, you can start the journey by selecting "Start journey".
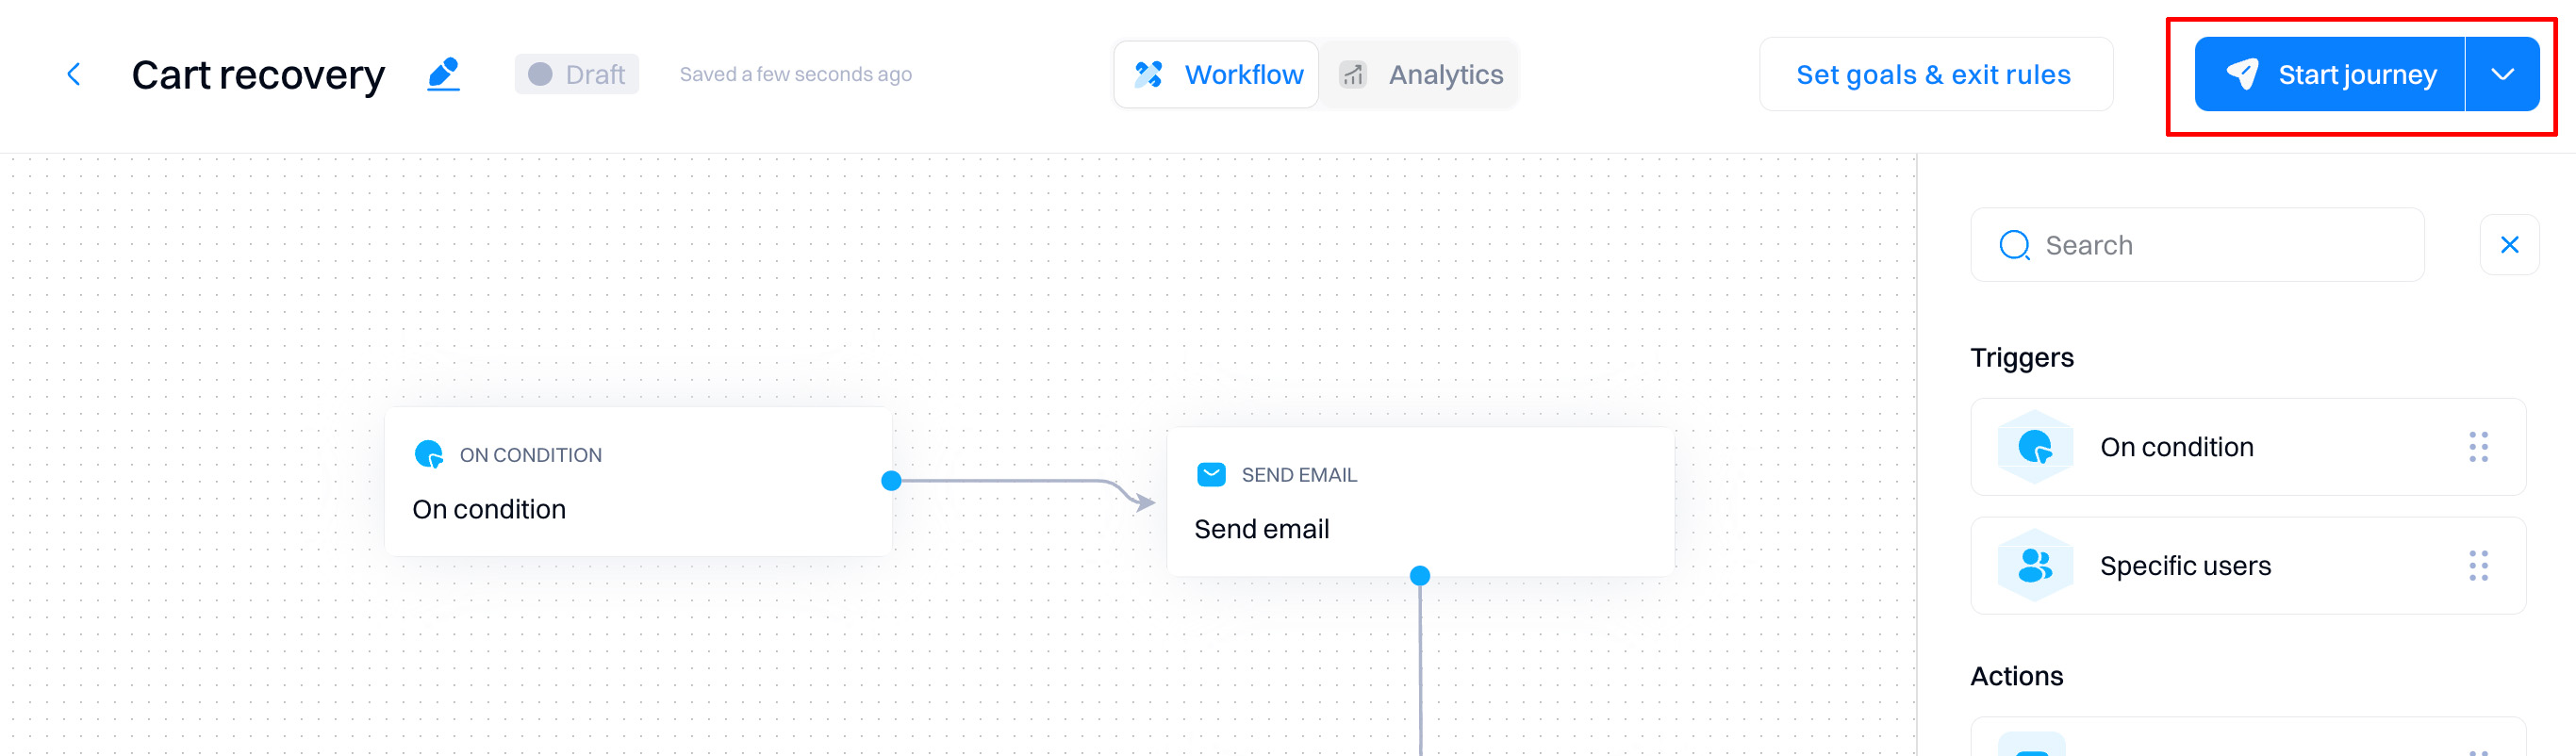
Users who match trigger conditions will start entering the journey once published.
You will be prompted to complete the setup if any configuration steps are missed.
Scheduling a journey
If you want the journey to start on a specific date, you can schedule its publishing time.
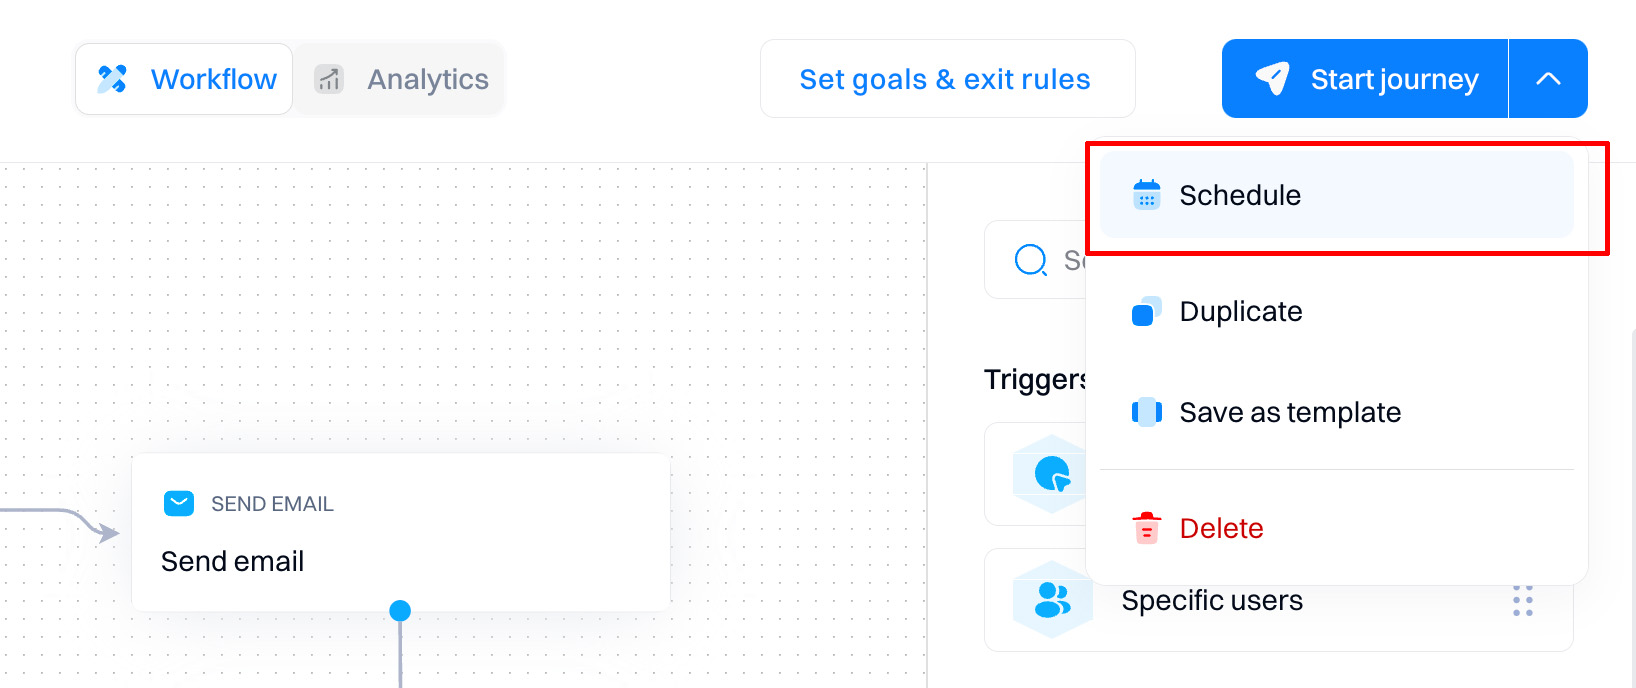

Enter a preferred starting time and select a timezone that matches your customer's.

When the scheduled time reaches the current time, the "Scheduled" state will automatically change to "Running."
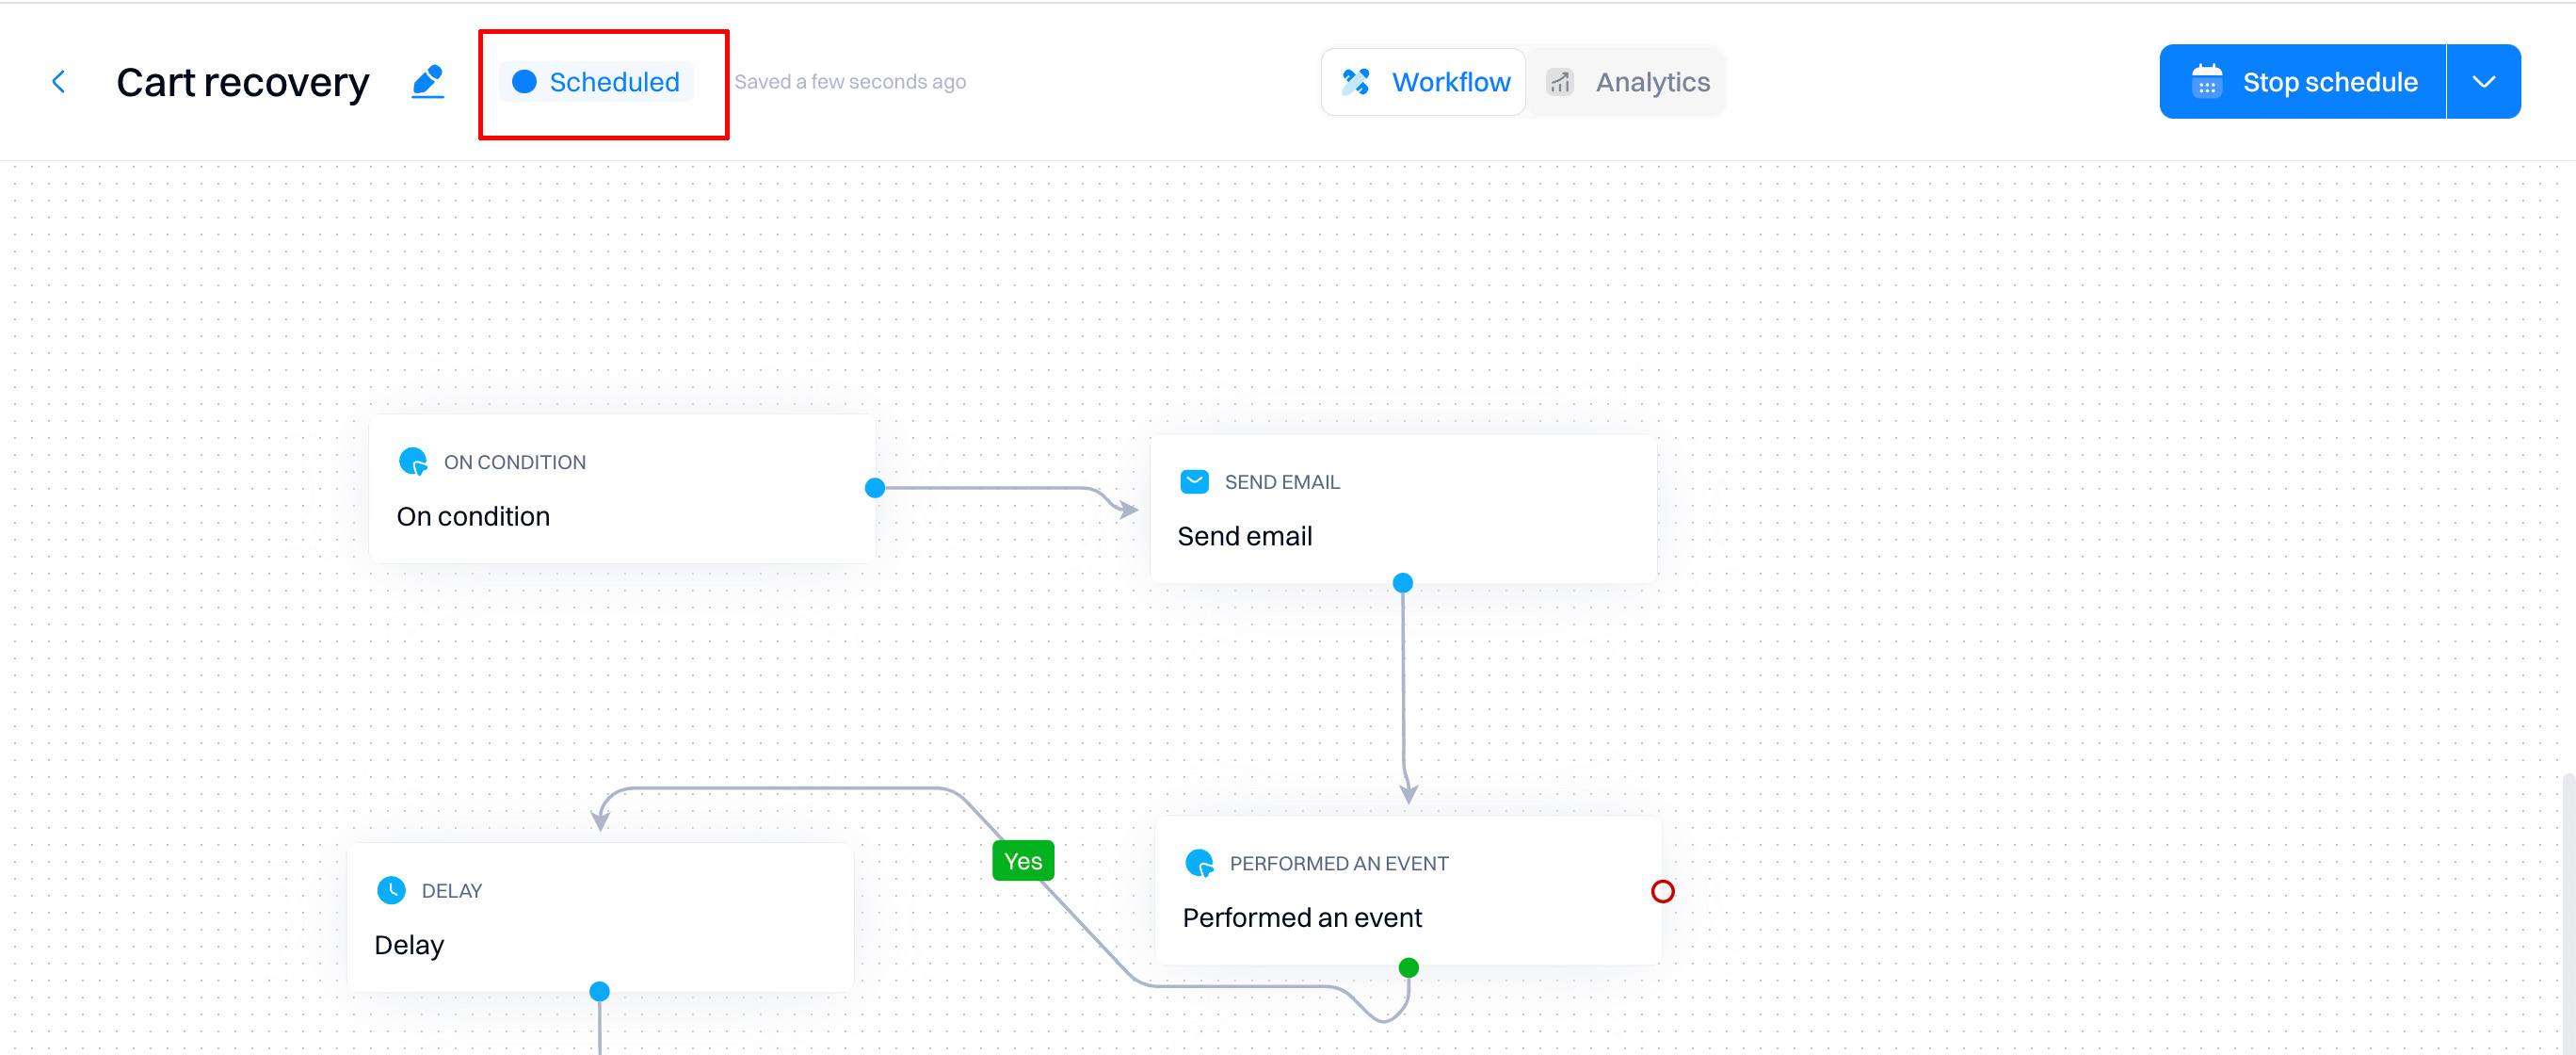
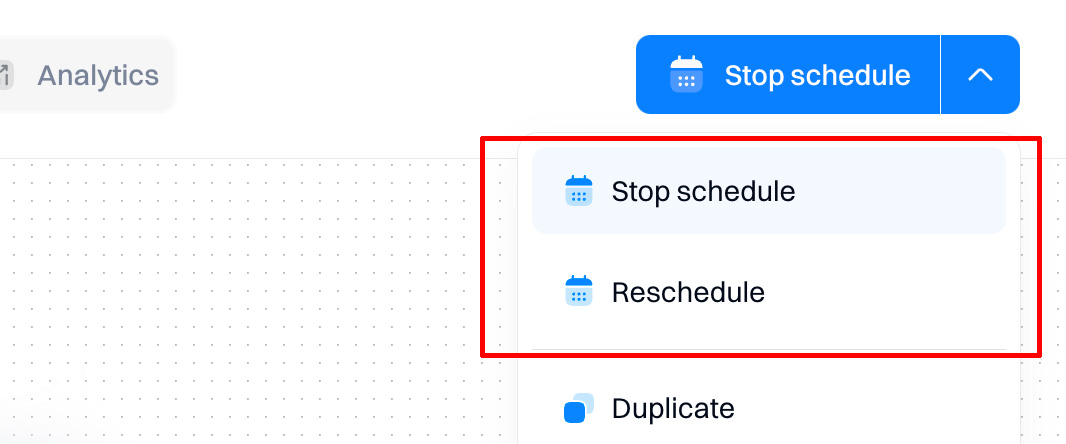
You can stop or reschedule a scheduled journey at any point before it reaches the target start date.
Where to go next
Refer to Managing a journeyon editing, pausing, and stopping a journey. Journey blocks is essential for understanding how to configure each block within a journey.
Updated 9 months ago